

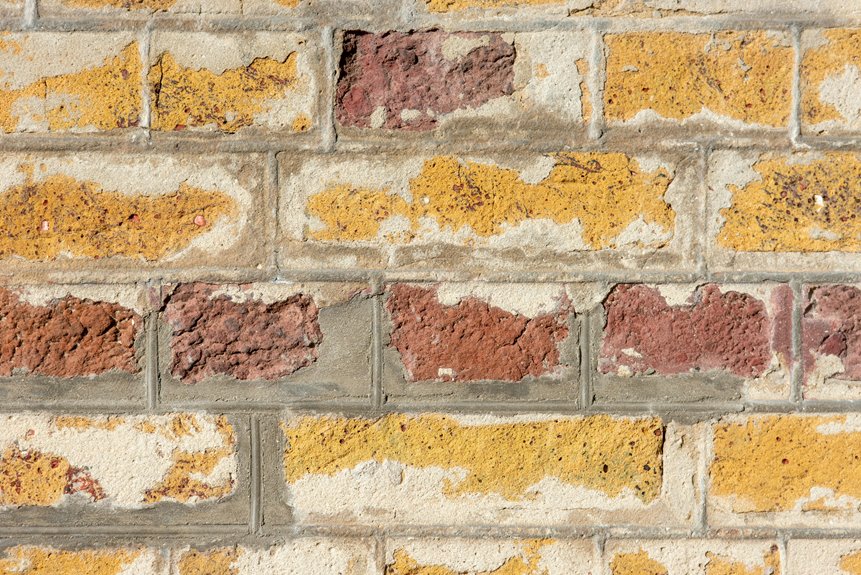
Painting exterior mortar is a bit like giving a tired wall a fresh set of clothes, but you need the right fit initially. Before you open a can, you’ll want to check the mortar’s condition, clean away dust and grime, and fix weak spots so the paint doesn’t fail prematurely. Then you can choose breathable products, protect nearby surfaces, and apply the finish the right way, because one small shortcut can turn a good job into a flaky mess.
What You Need Before Painting Exterior Mortar
Before you open a paint can, get your mortar and brick ready the right way, because a clean, dry surface makes the whole job easier and helps the paint stick. You’ll need safety gear, a stiff brush, a wire brush, sandpaper, painter’s tape, plastic sheeting, a drop cloth, putty or caulk, and a good masonry primer.
To start, clear dirt and loose bits so your surface feels solid under your hand. Next, smooth rough spots and fill bigger gaps so the finish looks neat and you feel proud of it. Then cover trim, windows, and the ground so cleanup stays easy.
Weather timing matters too, because dry conditions help the brick cure fully before you prime. Whenever you gather everything now, you set yourself up for a smoother, more welcoming paint day.
Make Sure Your Mortar Can Be Painted
Testing your mortar’s condition initially can save you a lot of stress later. You want a surface that feels firm, dry, and steady, not crumbly or damp. Check surface compatibility via seeing whether the mortar accepts a light scratch without shedding flakes. If it powders in your hand, paint won’t hold well.
Also watch the weather, because temperature limits matter more than people reckon. Mild, dry days give you the best chance for a clean bond. Should the wall stay wet after rain, wait.
You’re part of a crew of smart DIYers while you slow down here. A sound mortar joint lets paint grip better, so you can move ahead with confidence instead of crossing your fingers and hoping for the best.
Clean Exterior Mortar the Right Way
Once your mortar is sound and dry, you can get it truly ready via cleaning it the right way. Start by brushing off loose dust, cobwebs, and grit with a stiff brush. Then rinse the area so the surface looks fresh, not dusty.
Should stains cling on, use pressure washing on a low setting and keep the nozzle moving. You want to clear grime, not chew up the mortar.
For oily spots or mildew, choose mild chemical cleaners made for masonry, and test a small area initially. Scrub gently, then rinse well so nothing stays behind. Let the mortar dry fully before you paint.
Whenever you clean it with care, you give your finish a smoother start and a result you can feel proud of.
Repair Cracks and Missing Mortar
Start via inspecting the mortar for cracks, gaps, and any spots that feel loose or crumbly.
Then scrape out the damaged mortar so the new fill can bond well, and patch any missing sections with fresh masonry mix.
This step matters because solid repairs help your paint look smooth and stay put longer.
Inspect Crack Damage
Carefully inspect the mortar before you paint, because cracks and missing spots can turn a good finish into a messy one fast. You want to walk the wall with a calm eye and note every hairline split, open joint, and crumbly patch.
A simple structural assessment helps you see whether the damage stays on the surface or points to a deeper issue. Should you spot damp stains or soft areas, moisture mapping can show where water keeps sneaking in.
Mark each problem with chalk so you can track it later. Then check corners, ledges, and window edges, since those spots often need extra care. Whenever you catch damage promptly, you stay in control, and your paint job has a much better shot at looking clean and lasting.
Remove Loose Mortar
Chip away any loose mortar now, because this step keeps your repair from failing later. You’ll want to work gently with a chisel and stiff brush, so you don’t widen the damage. Start alongside checking the joints after power washing, since that can reveal crumbly spots you missed.
Provided dust still clings, use a light chemical treatment made for masonry to loosen stubborn residue, then rinse and let the area dry. As you clear the weak material, keep the edges firm and square, because solid sides help the new repair bond well.
Take your time and move section to section. That way, you stay in control and the wall feels cared for, not hacked at. Once the loose mortar is gone, the surface is ready for the next step.
Fill Missing Sections
With the loose mortar out of the way, you can fill the gaps that still weaken the wall. Pack small voids with fresh mortar, then press it tight so it bonds with the edges. For deeper breaks, shape the patch to match the surrounding joints, because that helps with historical replication and keeps the wall looking like it belongs.
| Fix | Why it matters |
|---|---|
| Clean edges | Helps the new mortar grip |
| Dampen the gap | Slows drying |
| Press in layers | Reduces cracking |
| Match texture | Blends old and new |
| Add decorative scoring | Restores the original look |
If you work neatly, you’ll protect the wall and keep the repair easy to paint later. Use a small tool, stay patient, and check each spot before moving on.
Protect Brick, Windows, and Trim
Before you paint, protect the parts of the house you don’t want to touch. Start with window protection using taping the glass edges tightly, then cover sills with plastic.
Next, do trim masking along wood or metal edges so your lines stay crisp and your cleanup stays easy. Use painter’s tape that sticks well but lifts cleanly. Press each strip down with your fingers to seal gaps.
Then lay drop cloths at the base of the wall to catch splatter and dust. Should brick meets siding, wrap that seam carefully so paint won’t creep where it shouldn’t.
Take a minute to check corners and vents too. A little care now keeps the job neat, and you’ll feel like the place is already on your team.
Choose Breathable Masonry Paint
You need masonry paint that lets vapor pass through the mortar, so trapped moisture won’t build up behind the finish. Mineral paint is a strong choice because it bonds without forming a heavy film, and it still gives you weather resistance with a bit of flex.
That mix helps your mortar handle sun, rain, and small shifts without peeling too soon.
Vapor Permeability Matters
Breathable masonry paint matters more than most people consider, because exterior mortar needs to let moisture move in and out safely. Whenever you block that path, you trap water, and the wall starts to feel stressed. You want a coating that supports moisture transmission, not one that fights it. Breathability testing helps you compare products before you commit, so you can choose with confidence.
| Check | What to look for | Why it helps |
|---|---|---|
| Label | Masonry or breathable rating | Keeps vapor moving |
| Test | Breathability testing results | Confirms real performance |
| Finish | Flat, porous look | Reduces trapped moisture |
That choice helps your home stay dry and your repair work last. You’re not just painting mortar. You’re protecting a shared space that can breathe, stay strong, and keep trouble out.
Mineral Paint Options
Among the best choices for exterior mortar, mineral paint gives you the balance that matters most: strong color, solid adhesion, and real breathability.
You get a finish that feels right on masonry because it works with the wall, not against it. Look for mineral binders that lock the paint into the surface, and choose breathable pigments that keep the color clear and steady.
This helps you protect the mortar while keeping its natural path open for moisture vapor. Whenever you pick this kind of paint, you join a smart crowd of homeowners who care about lasting results and a clean look.
You can still test a small patch initially, but mineral paint often makes the whole job feel easier, calmer, and more confident.
Weatherproof Yet Flexible
Because exterior mortar has to face rain, sun, and shifting temperatures, the paint you choose needs to do more than look good. You need a breathable masonry paint that lets moisture escape while still guarding the surface. That balance keeps you from trapping dampness, which can cause peeling and weak spots later.
- Choose formulas made for masonry, not standard wall paint.
- Pick coatings that flex with thermal expansion.
- Use elastic sealants only where cracks need extra support.
When you match breathability with flexibility, your mortar stays safer through wet weather and hot afternoons. You also get a finish that feels like part of the wall, not a stiff shell sitting on top. That’s the sweet spot for a home that stays strong and welcoming.
Pick the Right Tools for the Job
A few smart tools can make exterior mortar painting feel much less like a headache and much more like a clean, steady job. Choose a small roller, a flat brush, painter’s tape, a drop cloth, and a sturdy scrub brush. You’ll move faster whenever each tool fits the task and your hands. Look for ergonomic handles, since they help you stay comfortable on longer stretches. For color matching, keep a sample card or a chipped piece nearby so you can compare shades before you start. Here’s a quick guide:
| Tool | Best Use | Why It Helps |
|---|---|---|
| Small roller | Joints | Covers fast |
| Flat brush | Edges | Gives control |
| Tape | Trim | Protects clean lines |
| Drop cloth | Ground | Catches spills |
| Scrub brush | Prep | Lifts loose grit |
Whenever your kit feels right, you’ll work with more confidence and less stress.
Apply Primer to Exterior Mortar
Now that you’ve got your tools lined up, it’s time to seal the surface and set the stage for paint that actually sticks. Brush on a masonry primer in a steady coat, and work it into the mortar so it fills pores and grabs tight. Should you want a cleaner finish, ask for primer tinting close to your top color. That helps you feel less pressure later, because the base already does some of the visual work.
- Keep the coat even, not thick
- Follow the label for drying time
- Let environmental curing match your weather
When the mortar looks dry and solid, you’re ready for the next step with confidence. One good coat can make the whole wall feel like part of your space, not a patchy afterthought.
Paint Exterior Mortar Evenly
Start with a steady hand and paint the mortar in even strokes so the finish looks clean instead of rushed.
You’ll feel more confident whenever you keep your brush loaded the same way each time and move in one direction.
Check color matching in a small spot initially, because mortar can shift under sunlight and make tiny changes stand out.
Then work across the joints with light pressure, not heavy scrubbing.
Keep your lines tidy by reloading before the brush runs dry.
Should you stop, wipe drips right away so they don’t harden into trouble.
Good tool maintenance matters too, since a clean brush spreads paint more smoothly and helps you fit right in with the rest of the wall.
Add a Second Coat for Better Coverage
Provided that the initial coat looks a little thin or patchy, don’t worry, because that’s where the second coat saves the day. You’re not fixing a mistake; you’re finishing the look your wall deserves.
After the opening layer dries, do quick coverage testing in bright light, then load your brush or roller again. Work in the same direction so the color settles evenly and the texture blending stays natural.
- Brush lightly over faint spots.
- Keep edges soft and consistent.
- Check each section before moving on.
As you go, you’ll notice the mortar starts to feel more like one team than separate parts. That’s the goal: smooth color, steady depth, and a finish that looks cared for, not crowded.
Paint Hard-to-Reach Mortar Areas
Upon reaching tight mortar spots, use an extension pole to keep your brush steady and your hands off the wall.
For corners, edges, and narrow joints, switch to a narrow brush so you can place paint where the roller can’t fit. That little change makes the work smoother and saves you from chasing drips later.
Extension Pole Techniques
An extension pole can make tough mortar jobs feel much less frustrating because it lets you reach high or wide areas without overstretching or wobbling on a ladder. You stay steady, and that calm control shows in cleaner paint lines.
Choose a pole with a telescoping handle so you can adjust reach fast. Then lock it tight before you start. Add a small brush and use brush stabilization with both hands for smoother strokes.
- Keep your elbow close to your side.
- Move in short, even passes.
- Recheck the lock before each section.
As you work, paint a few joints, then shift your stance and continue. That rhythm helps you feel part of the job, not stuck fighting it.
Narrow Brush Access
Slip into the tight spots with a narrow brush, and you’ll find those awkward mortar lines get a lot less intimidating. You can join the crew of careful painters alongside choosing a brush that fits corners, seams, and concealed edges. Keep your wrist light, and let the bristles follow the line instead of forcing them.
| Area | Move | Feeling |
|---|---|---|
| Joints | Slow strokes | Calm |
| Corners | Angle the tip | Relief |
| Gaps | Reload often | Confidence |
These precision tips help you cover tight spaces without smearing brick faces. Should the brush start dragging, add a little water or paint thinner, then keep going with short, steady passes. You don’t need perfect hands, just patient ones. With each small section, you’ll feel more at home on the wall, and that confidence shows in the finish.
Avoid These Mortar Painting Mistakes
Before you pick up the brush, it helps to know that most mortar painting problems start long before the color goes on. In case you rush prep, your finish can look patchy and feel off from the rest of the wall. For solid color matching, test a small spot in daylight, then check it again after drying, because temperature effects can shift how the shade reads.
- Clean and dry the mortar fully so paint grips well.
- Pick a primer that suits masonry, or you might fight peeling later.
- Don’t skip masking, because stray paint breaks the neat look your crew loves.
Also, work in mild weather. Hot sun can dry paint too fast, while cold air slows bonding. Whenever you stay patient, you give your wall the even, friendly finish you came for.
Maintain Painted Mortar
To keep your painted mortar looking sharp, give it a regular cleaning with a soft brush and mild soap so dirt doesn’t settle in.
Then check it often for chips, fading, or hairline wear, because small touch-ups now can save you a bigger fix later.
A quick glance after heavy rain or winter weather can help you catch trouble before it spreads.
Regular Cleaning Routine
Regularly cleaning painted mortar helps it stay bright and smooth without wearing away the finish. You can keep that fresh look through using soft seasonal maintenance habits that fit your home and your routine.
- Rinse the surface with a garden hose to lift dust and pollen.
- Wipe smudges with a soft sponge and mild soap.
- Store brushes, cloths, and other equipment storage items in a dry spot.
When you clean, move gently and let the water do most of the work. That way, you protect the paint and still feel proud of the wall you care for.
Should dirt settle after storms, handle it soon so it doesn’t cling. A little attention now helps your painted mortar stay welcoming, neat, and ready to make your exterior feel like home.
Inspect For Wear
After you’ve kept the surface clean, your next job is to watch for wear so small problems don’t turn into bigger repairs.
During each seasonal inspection, look for peeling paint, hairline cracks, chalky spots, and damp stains around joints. Run your hand over the mortar, too, because rough patches often show where the finish is thinning.
Should you spot weak areas, mark them and check again after rain or a hard freeze. You can also do simple chemical testing on any suspicious stain to see whether salt or moisture is causing trouble.
Catching these clues at an early stage helps you stay ahead of damage and keeps your mortar looking cared for, not tired. With a little attention, you protect the finish and keep your home in the neighborhood looking solid.
Know When To Repaint Exterior Mortar
You should repaint exterior mortar once it starts to look worn, faded, or patchy, because fresh paint can protect the surface and help your brickwork look cared for again.
Should you love historic preservation, check older mortar for chalky spots, hairline wear, or peeling.
You’ll also notice changes from sun, rain, and shifting aesthetic trends that can make a wall feel tired fast.
- Look after rain, whenever damage shows clearly.
- Repaint should color no longer feels even.
- Act before moisture slips into weak spots.
Whenever you stay ahead of wear, you join neighbors who value a tidy home and a strong street.
That small effort keeps your place looking warm, steady, and easy to welcome people into.
Frequently Asked Questions
Should I Tint Primer to Match the Final Mortar Color?
Yes, tinting the primer to match your final mortar color can improve coverage, help the finish look more even, and support consistent color across the surface. It may also reduce the number of topcoat applications needed and create a more uniform result.
What’s the Best Way to Paint Mortar Without Covering Brick Edges?
Use a mortar wash, then wipe the brick faces promptly with a damp cloth. Keep the edges sharp by masking the brick lines and using a small pointing trowel for clean control, so the finish stays neat and the brickwork remains distinct.
Can I Use Acrylic Paint for Small Mortar Touch-Ups?
Yes, you can use acrylic paint for small mortar touch-ups if you match the color carefully and prep the surface well. It can work for minor patches, especially if you seal the area afterward and protect it from moisture.
Is a Mortar Wash Better Than Full Mortar Paint Coverage?
Yes, a mortar wash is often the stronger choice if you want muted color shifts and the brick’s texture to stay visible. It keeps the masonry’s original character intact instead of covering it over, and it creates a classic, understated finish.
How Do I Test Paint Adhesion Before Painting the Entire Wall?
You’ll test with a scratch test and an adhesion patch: clean a small spot, prime it, paint it, then let it dry. Press painter’s tape onto the edge and pull it off quickly. If the paint lifts, you need more surface prep before painting the whole wall.



