Address
304 North Cardinal
St. Dorchester Center, MA 02124
Work Hours
Monday to Friday: 7AM - 7PM
Weekend: 10AM - 5PM
Address
304 North Cardinal
St. Dorchester Center, MA 02124
Work Hours
Monday to Friday: 7AM - 7PM
Weekend: 10AM - 5PM

A fresh coat of paint can fail fast if the trim underneath is thirsty, slick, or patchy. You usually need primer on bare wood, repaired spots, exposed end grain, metal, PVC, or any trim with stains or old damage. But should the old paint be solid and the surface looks even, you might be able to move straight to paint. The trick is understanding which surfaces need extra help, and that’s where things get interesting.
Exterior trim primer is the base coat that helps paint grab onto the surface and stay there, and it does a lot more than just change the color underneath.
You use it to build a stronger bond, so your trim feels ready, not rushed. Good primer chemistry helps it soak in, seal pores, and create a smoother path for the topcoat. That matters whenever you want your home to look cared for and to hold up with the crew.
It also shapes environmental impact, since the right primer can reduce wasted paint and repeat work.
In plain terms, primer gives you a steadier start. It helps your brush glide better, and it can make the finish look more even, which feels pretty great whenever you’re aiming for a clean, confident result.
You need primer once you expose bare wood, because it soaks up paint fast and can leave the finish patchy.
You also need it on repaired spots, since filler, sanded areas, and new patches often grab paint differently than the old trim.
As soon as you spot these problem areas promptly, you give your trim a smoother base and a cleaner final look.
Bare wood is one of the clearest signs that primer is needed before you paint exterior trim.
You can spot it on cut edges, exposed end grain, or around weathered knots where the old coating has failed.
Whenever you leave those areas open, the wood drinks in paint unevenly, and the finish can look tired fast.
Primer gives you a fresh start through sealing those thirsty spots and helping the topcoat grab better.
It also helps you feel more confident, because your trim won’t be fighting the weather alone.
So in case you see raw patches, don’t rush past them.
Clean them, let them dry, then prime them right away so your trim feels cared for and looks like it belongs.
Repaired spots need primer for the same reason raw wood does, but they ask for a little extra care.
Whenever you fill cracks or sand a patch, you expose fresh material that drinks paint unevenly. Primer helps you lock down that area, so the topcoat looks like it belongs there, not like a quick fix. It also supports patch blending, which softens the edge between old trim and new repair. In case the repair has ridges or tiny pinholes, primer helps with texture matching too, so the surface feels even and reads as one clean piece.
Brush it on after the filler dries, then check for any thin spots. Should you still see bare material, add another coat. That small step saves you from a spotty finish later, and honestly, your trim deserves that win.
Primer isn’t always needed on trim, and that’s a relief provided the surface is already in good shape. You can skip it when old paint still grips well, the finish looks dull, and you’re not hiding stains. That choice can bring cost savings and make temporary fixes feel less costly too.
| Skip primer when | Why it helps |
|---|---|
| Paint is sound | New paint can bond well |
| Surface is clean | You avoid extra steps |
| Color change is small | Coverage stays even |
In case you’re unsure, test a small spot first. Then watch how the paint sits after it dries. You want trim that feels part of your home, not a patchwork job. That little check helps you move forward with confidence and stay in the crew that gets it right.
You need a different primer for each trim material, because wood, metal, and PVC each come with their own problems.
Wood soaks up coating and might need extra sealing, metal needs rust protection, and PVC needs a primer that helps paint grip to its slick surface.
Whenever you match the primer to the material, you give your trim a much better shot at a smooth, long-lasting finish.
Preparing wood trim the right way starts with the primer, because it helps the coating grip, seal, and last longer. You belong in a project that feels steady, not stressful, so start with clean, dry wood.
Brush off dust, scrape loose paint, and sand rough spots so the primer can sink in. Good primer chemistry matters here, because it locks down thirsty grain and helps your topcoat lay smooth.
Should you see bare spots after one coat, add another light coat. Whenever you choose primer, consider environmental impact too, since low-odor, lower-VOC options can make your space easier to live in.
Then you’ll get trim that looks even, feels protected, and stands up better to sun, rain, and everyday wear.
Rust has a way of sneaking in just as you least want it, but the right primer can stop that headache before it starts.
Whenever you paint metal trim, you give it a shield that blocks moisture and slows rust from returning. Choose a primer made for metal, because it carries rust inhibitors that help protect bare spots and old fasteners.
In case your trim touches other metals, you also lower the risk of galvanic corrosion, which can happen when damp metals react together.
To start, clean off loose rust and grime, then let the surface dry well. After that, brush on primer evenly so every edge gets covered.
You’ll feel better understanding your trim isn’t just painted, it’s guarded and ready for the weather.
PVC trim needs a little extra care before paint will truly hold, and that starts with the right prep on wood, metal, and PVC surfaces alike. You want the surface clean, dull, and dry so your coating can bond like it belongs there. Wipe off dust, wash away grease, then lightly scuff glossy spots to help adhesion promoters bite. On mixed trim, test a small spot with solvent testing first, because some cleaners can soften PVC fast.
When you prep this way, you give your trim a stronger start and a smoother finish.
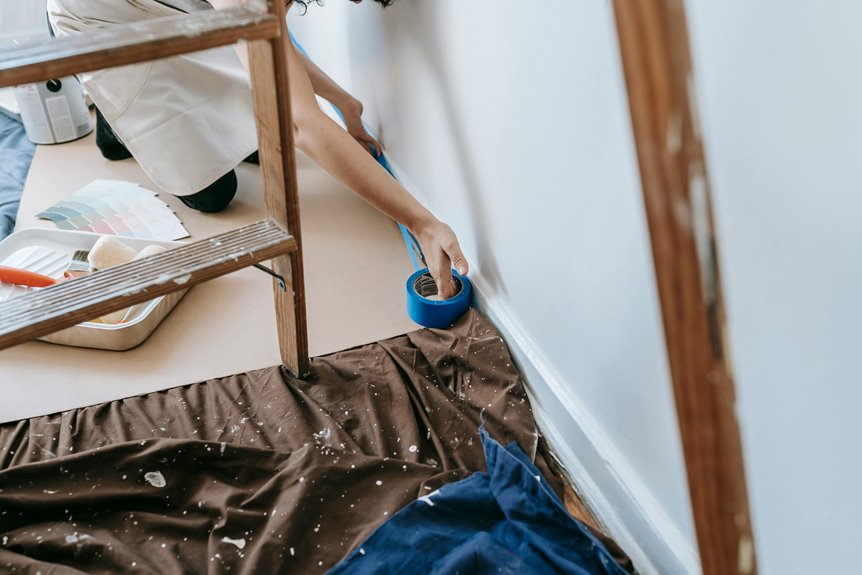
A careful cleanup makes priming exterior trim much easier, and it also helps the paint hold on for the long haul. You’ll feel more confident once you start with the right tool selection, like a stiff brush, sanding block, and tack cloth.
Next, check for peeling paint, mildew, dirt, and loose caulk, then clear them away so you’re not trapping trouble under the primer. After that, use edge taping around glass, siding, or brick to keep lines neat and to save yourself extra scraping later.
Should you find cracks or dents, fill them and let them dry before you move on. Whenever you take these prep steps, you give your trim a clean, steady surface that makes the whole job feel less stressful and more like a team win.
You’ll get better results once you start with clean trim, because primer sticks best to dirt-free, dry surfaces.
After that, you can apply primer evenly to bare wood, repairs, and any problem spots so the paint bonds well and lasts longer.
Should you rush this step, the finish can fail sooner, but a careful coat now helps your trim stay smooth and strong.
Surface cleaning is often the step that saves the whole trim job from going sideways. You want your trim to feel like it belongs on the house, not like it’s fighting the old dirt. Start with a cleaning checklist so you don’t miss grit, chalky residue, or mildew spots. Use biodegradable cleaners whenever possible, since they’re kinder to your yard and still tough on grime.
If you skip this part, paint can cling to dirt instead of wood, and that’s a fast path to regret. Once the surface feels clean and solid, you’re giving your project the calm, ready-for-prime start it needs.
Once the trim is clean and dry, primer can finally do its job without fighting old dirt or damp spots.
You’ll want to use a small brush so you can work the edges, joints, and nail holes with control. Brush on a thin, even coat, because heavy primer can drip and hide flaws instead of fixing them. In the event bare wood still shows after it dries, give it a second coat.
Check primer compatibility with your topcoat so the finish bonds well and stays smooth. Also, keep primer ventilation steady through opening windows and wearing a mask provided the label calls for it.
Then let the primer dry fully before paint. That little pause helps your trim feel solid, ready, and part of the same polished home.
Weather can make priming trim feel easy one day and tricky the next, so it pays to plan around the conditions before you even open the can. You want weather timing on your side, because trim that’s too hot, cold, or damp can fight the primer. Moisture control matters just as much, since concealed water can slow drying and weaken grip.
Whenever you work with the weather, you join the group of homeowners who get smoother results and fewer do-overs. That feels good, and it saves you from painting over a problem. Let the trim dry fully, then prime with confidence.
The right primer can make exterior trim feel a lot less fussy, because it gives your paint a solid place to grab. For bare wood, choose a high-adhesion exterior primer that offers weatherproof bonding and blocks tannins from cedar or redwood. Should you be working with metal trim, go with a rust-inhibiting formula. For older trim with mixed surfaces, a bonding primer helps you get one smooth base, so your topcoat looks like it belongs there.
You’ll also want low environmental VOCs should you care about cleaner air around your home. In most cases, a stain-blocking acrylic primer works well because it dries fast, sands nicely, and supports strong paint grip. Use the label as your guide, and match the primer to the trim you’re painting.
Grab a close look at your trim before you reach for the caulk gun, because this step can save you from a lot of touch-up headaches later. You’ll want to repair trim when you see open seams, hairline cracks, loose joints, or small holes that invite water. Seasonal timing matters too; pick a dry stretch so the sealant can set well. If you spot expansion gaps where boards meet, fill them with exterior caulk, but leave room for movement.
When you fix these problem areas promptly, you help your trim stay tight, clean, and ready for the next step with less stress and more confidence.
Usually, you can paint exterior trim after the primer dries to the touch and cures enough to bond well, but the exact wait time depends on the primer you used and the weather that day. You want to follow the drying times on the can, because cool air and high humidity slow everything down.
In case the primer feels tacky, give it more time so your topcoat goes on smoothly. Many primers also have a recoating window, which tells you when paint will grip best. Plan your day so you can move from priming to painting without rushing, and check a small spot first should you be unsure.
Whenever you wait the right amount, your trim looks sharper, and you feel confident with the whole crew.
One of the easiest primer mistakes to make is skipping prep because the trim “looks fine,” but that shortcut can cost you later. You want every board clean, dull, and dry so the primer can grip like it belongs there.
Next, apply primer solely where bare wood, stains, or repairs need it, unless the whole surface needs a full coat. Should you be unsure, you’re not alone. Check the can directions, test a small area, and trust that careful steps save you from peeling later.
Old trim paint is sound when it stays tightly bonded, does not peel, does not chalk, and feels hard under firm pressure. Check adhesion with tape and a pull test, and if the surface remains solid, it is ready to keep.
Yes, primer can help stop tannin bleed on cedar trim. Use a tannin blocking sealer made for bare cedar, since it locks in the wood’s natural oils, improves adhesion, and helps the finish stay even and durable.
Yes, prime trim after pressure washing once the wood is fully dry. Check for moisture first, then spot prime bare wood, repairs, and stains to improve adhesion and help the finish last longer.
Yes, you will need a lead-specific encapsulation primer, not a standard coat. Think of it like a seal on a storm door: it locks the hazard in place. Use certified professionals and stain blockers for a safer, smoother finish.
Yes, you can use a stain blocking primer to cover stains and reduce odors on exterior trim, but surface prep matters. Clean, sand, and repair the trim first for durable coverage.