

Like a well-kept stage prop, an appliance’s finish can make or break a room, and I’ve found that the best paint choices for 2026 balance durability, heat resistance, and color match with surprising finesse.
From CIONIA’s multi-surface coverage to Rustins’ radiator-safe enamel and precise touch-up pens, I’m breaking down what actually holds up, and which option could save you from a costly replacement.




More Details on Our Top Picks
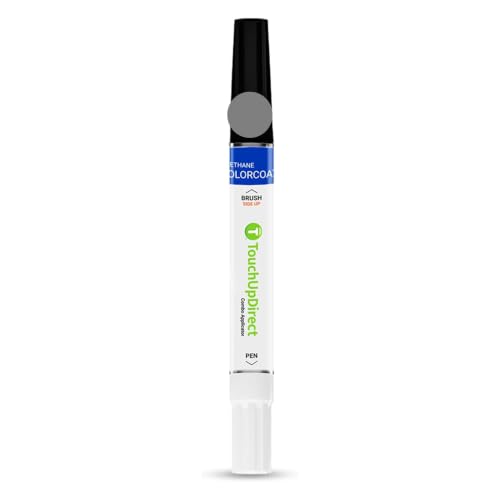
TouchUpDirect Perfect Match LG Graphite Steel Appliance Touch Up Paint
Need to fix a few light chips or scratches with precision? Reach for TouchUpDirect Perfect Match LG Graphite Steel Appliance Touch Up Paint. It matches LG Graphite Steel, also known as LG001, and is designed for steel surfaces with a gloss finish. The two-in-one pen and brush let you handle tiny nicks or wider scrapes in one step, so you do not need to guess which tool fits the damage. This low-VOC, adult-use touch-up paint comes in a 0.35 fl oz can and helps you repair small flaws confidently whenever the exact damage size is not clear.
- Color:Graphite Steel
- Finish:Gloss
- Applicator:Pen and brush
- Surface Use:Steel appliances
- Drying:Not listed
- Water Resistance:Not waterproof
- Additional Feature:Low-VOC formula
- Additional Feature:Combo pen-and-brush
- Additional Feature:Small damage repair
Krylon Appliance Touch Up Paint Pen 0.5 oz White
Krylon’s white appliance touch up pen is a smart value for quick scratch repairs. You get a 0.5 oz enamel epoxy formula that works on metal appliances and blends into a satin white finish. Use the fine tip for narrow nicks, then switch to the brush for wider chips. It dries to the touch in 15 minutes, handles in 30 minutes, and fully cures in 2 hours. For best results, apply it between 55°F and 75°F with humidity below 60%. It is for indoor use only, water resistant, and cleans up well with most household cleaners.
- Color:White
- Finish:Satin
- Applicator:Fine tip and brush
- Surface Use:Metal appliances
- Drying:Fast-dry
- Water Resistance:Water resistant
- Additional Feature:Epoxy enamel formula
- Additional Feature:Fast dry time
- Additional Feature:Household cleaner resistant
spot High-Gloss White Touch Up Paint for Appliances
spot High-Gloss White Touch Up Paint for Appliances gives your repair a seamless, glossy finish. You can use it to fix chips, scratches, stains, and small cracks on fridges, microwaves, dishwashers, dryers, tiles, porcelain, and metal surfaces. Its high-gloss white formula blends well with glossy finishes and resists yellowing, flaking, and chalky buildup. The fine-tip brush helps you apply it neatly, and the fast-drying, water-based liquid is odor-free, non-toxic, and ultra-low VOC. Shake, apply, and let it dry for a durable, water-resistant touch-up that fits easily in a drawer.
- Color:White
- Finish:High-gloss
- Applicator:Fine-tip brush
- Surface Use:Appliances and surfaces
- Drying:Fast-drying
- Water Resistance:Water resistant
- Additional Feature:Non-toxic formula
- Additional Feature:Odor-free
- Additional Feature:Yellowing resistant
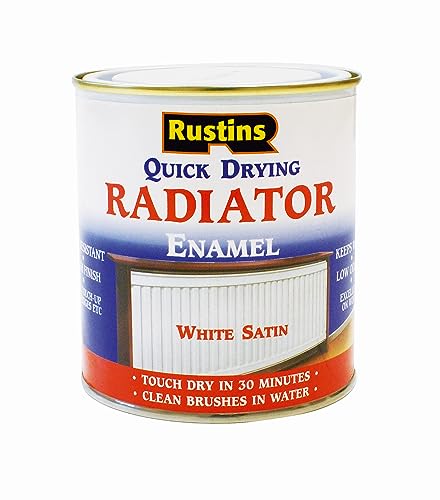
Rustins Quick Drying Radiator Enamel Satin 500ml
Rustins Quick Drying Radiator Enamel Satin 500ml is suitable if you are touching up white appliances and want a durable finish. You get a satin white enamel that stays white and resists yellowing, so your repair looks fresher for longer. It is heat-resistant, low-odour, and touch dry in about 30 minutes, which helps you finish jobs faster. Use it on radiators and similar surfaces, but do not apply it to oil-filled electric radiators. The 500ml can gives you enough paint for targeted touch-ups, and the Rustins formula offers a neat, lasting result.
- Color:White
- Finish:Satin
- Applicator:Liquid can
- Surface Use:Radiators/appliances
- Drying:Touch dry 30 min
- Water Resistance:Not listed
- Additional Feature:Heat-resistant coating
- Additional Feature:Low-odour formula
- Additional Feature:Stays white
CIONIA All-in-One Multi-Surface Ivory White Paint
If you want a versatile appliance paint, CIONIA All-in-One is a strong choice for quick, small-scale refreshes. It comes in ivory white, a semi-gloss acrylic finish, and a 5 fl oz bottle that works on wood, metal, glass, leather, vinyl, and more. Since it combines paint and primer, you can skip sanding, priming, and top coats on many jobs. It dries fast, covers well, and leaves a smooth finish that resists peeling indoors or out. Apply it with a brush, roller, or spray gun. It is also useful for testing color and texture before committing to larger projects.
- Color:Ivory White
- Finish:Semi-gloss
- Applicator:Brush/roller/spray
- Surface Use:Multi-surface
- Drying:Quick-dry
- Water Resistance:Waterproof
- Additional Feature:Paint-primer combo
- Additional Feature:No sanding needed
- Additional Feature:No top coat
Rust-Oleum Painter’s Touch Ultra Cover Brush Paint
Rust-Oleum Painter’s Touch Ultra Cover gives your appliance a smooth, durable finish with excellent coverage. You can use this 8 oz satin Canyon Black latex paint on metal, wood, plaster, masonry, or unglazed ceramic, indoors or out. Its acrylic formula brushes on smoothly, delivers rich color, and covers up to 25 sq. ft. You also get waterproof protection plus resistance to chipping and fading, which helps your appliance keep its fresh look longer. Choose it if you want a general purpose satin black coating that is easy to apply and built for lasting results.
- Color:Canyon Black
- Finish:Satin
- Applicator:Brush-on paint
- Surface Use:Multi-surface
- Drying:Not listed
- Water Resistance:Waterproof
- Additional Feature:Covers 25 sq. ft.
- Additional Feature:Chipping resistant
- Additional Feature:Fading resistant
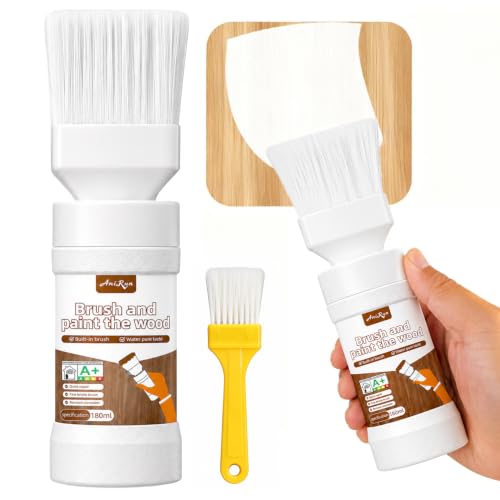
White Touch-Up Paint for Furniture Cabinets Multi-Surface
Anirun’s white touch-up paint is ideal for furniture repairs, cabinets, and quick multi-surface fixes. It comes in a 6.35 oz bottle with a built-in brush, so you can skip dipping and avoid mess. The milk paint formula works on wood, metal, exterior surfaces, and railings, and the gloss white finish helps repairs blend in. Because it is paint and primer in one, you do not need sanding, priming, or a top coat. It dries fast, cleans up with water, and has no odor. Use two coats for light spots or three for full coverage.
- Color:White
- Finish:Gloss
- Applicator:Brush applicator
- Surface Use:Furniture/cabinets
- Drying:Fast drying
- Water Resistance:Waterproof
- Additional Feature:Paint-primer combo
- Additional Feature:Skin-safe formula
- Additional Feature:Water cleanup
Factors to Consider When Choosing Appliance Paint
When I choose appliance paint, I first check surface compatibility so it adheres well to metal, plastic, or enamel. I also consider the finish type, application method, drying time, and durability level so the final result meets the look and performance I want.
Surface Compatibility
Before I choose appliance paint, I always check that it is made for the exact surface I am fixing, such as steel, metal, porcelain, ceramic, or even unglazed ceramic, because adhesion and finish quality can vary a lot. If the appliance is already painted or feels slick, I look for paint that bonds to smooth surfaces, or I make sure light sanding is recommended first. For indoor appliances, I confirm the formula is meant for interior use and can handle regular cleaning with household cleaners. If the spot may see moisture or frequent washing, I pick something with at least water resistance, since not every touch-up paint is fully waterproof. When I am dealing with mixed materials or uncertain damage, I choose a product that lists multiple surface compatibility for consistent coverage.
Finish Type
Once I’ve confirmed the paint works on the right surface, I turn to finish type because it affects both the look and how well the repair blends in. I choose a sheen that matches the appliance’s original look, since satin, gloss, and high gloss all reflect light differently. Satin gives me a softer sheen, and it can hide minor surface flaws better than shinier options. When I’m matching polished, modern appliances, I lean toward gloss or high gloss for that crisp, reflective appearance. I also look for a finish that resists yellowing, flaking, and chalky buildup so the repair stays clean over time. If I’m comparing options, I check the surrounding surface’s finish type, not just its color, for the most seamless result.
Application Method
How I apply appliance paint matters just as much as the paint itself, so I always match the applicator to the damage. For tiny chips, I reach for a fine-tip pen because it lets me stay precise and avoid spreading paint where I do not need it. For longer scratches or scraped areas, I prefer a brush since it covers more surface with less effort. When I am unsure which I need, I like two-in-one applicators that give me both options in one tool. On flat, visible surfaces, brush-on formulas feel easiest to control. When I want a quicker repair with less setup, I choose a one-step applicator. For repeated touch-ups, I find a bottle or tube with an included brush more practical and mess-free.
Drying Time
Drying time matters to me because it affects both the repair schedule and the final finish. I always check the label before I plan a second coat, because dry-to-touch time can range from about 15 minutes to 30 minutes or more. I also watch dry-to-handle time, since some appliance paints need around 2 hours before I can use the surface normally. In lower humidity and moderate temperatures, drying is usually faster. High humidity can slow things down and dull the result. When I need a quick fix, I look for paints made for fast touch-ups. For frequently used appliances, I choose a product with a clear drying schedule so I can match the job to my downtime.
Durability Level
Whenever I choose appliance paint, I always judge how much wear the surface will take, because tougher formulas are more likely to resist chipping, fading, and flaking over time. I also check whether the coating offers water resistance or waterproofing, since moisture can deteriorate a finish faster than expected. When I am painting metal, porcelain, or ceramic, I prefer paint and primer in one products because stronger adhesion usually means better durability. I do not stop at the label’s dry to touch claim either. I compare it with the full cure time so I know when the finish truly hardens. For appliances that get hot or cleaned often, I choose a stable coating that will not yellow and can stand up to household cleaners.
Color Match
As I choose appliance paint, I match the color code or exact shade name to the existing finish so small differences in whites, blacks, grays, or metallic tones do not show up after the paint cures. I also check the sheen because gloss, satin, and high-gloss reflect light differently and can make one color look lighter or darker. For visible repairs, I want the base hue and undertone to align, especially on white, ivory white, graphite steel, or black appliances. If I am unsure, I test the paint on a concealed spot first and let it fully cure. Aging matters too, since wear, yellowing, and fading can shift the finish, so I may need a shade that fits the appliance’s current look.
Safety Features
For safer results, I look for appliance paint that is low VOC, odor free, or water based, especially when I am working indoors and want fewer fumes. I also check for a non toxic formula when I am painting near people or pets, because that matters a lot in enclosed spaces. If I need to clean the surface often, I want paint that is water resistant or waterproof and made for indoor use, so it stands up to moisture and common household cleaners. I do not ignore drying details either. I want to know when it is dry to touch, dry to handle, and fully cured before I use the appliance again. Those safety features help me make a smarter choice and keep the job cleaner, easier, and safer from start to finish.
Frequently Asked Questions
How Long Does Appliance Paint Typically Take to Cure Fully?
I’d say appliance paint usually takes 24 to 72 hours to dry enough to handle, but it can take 7 to 30 days to cure fully. Avoid heavy use until then.
Can Appliance Paint Be Used on Plastic Refrigerator Handles?
I would avoid using appliance paint on plastic refrigerator handles unless the label says it is plastic-safe. I would clean the surface, sand it lightly, and use a primer made for plastic so the paint adheres better and lasts longer.
Is Primer Necessary Before Applying Appliance Touch-Up Paint?
Yes, primer is often necessary because it creates the foundation beneath the finish. I would use it on bare metal, rust, or scratches, and skip it only if your touch-up paint specifically says primer is not needed.
How Do I Fix Paint Drips Without Damaging the Finish?
I’d let the drip dry fully, then gently shave it with a razor blade or fine sanding pad, feather the edges, and touch up lightly with matching paint so you do not mar the finish.
Will Appliance Paint Withstand Frequent Cleaning With Household Chemicals?
Yes, if I choose a quality appliance paint and let it cure fully, I can clean it often with mild household chemicals. Harsh bleach, ammonia, or abrasives can still dull or damage the finish over time.



