

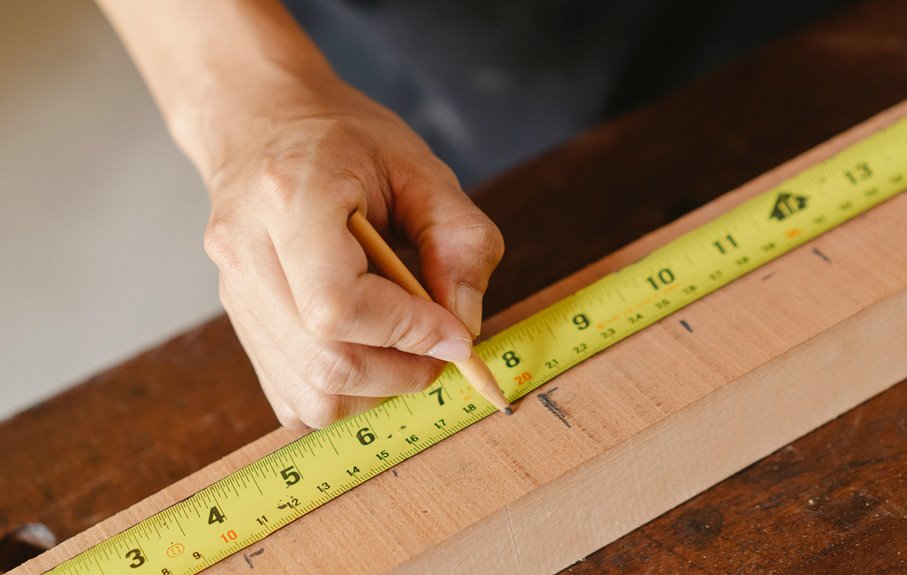
A wall can look straight until you try to fit wood against it, and that’s where scribing saves the day. You use it to trace uneven surfaces so trim, cabinets, and countertops sit tight instead of gapping and wobbling. In the sections ahead, you’ll see how to set up the workpiece, mark a clean line, handle tricky walls and floors, and avoid the small mistakes that can ruin a close fit.
What Is Scribing in Carpentry
Scribing is the simple but powerful step of tracing a true fit onto wood, so you can shape a piece to match a wall, floor, or other uneven surface. You’re not guessing here. You’re reading the space and letting the wood follow it.
In carpentry, that skill has a clear histor origin in careful handwork, where makers matched parts with patience and care. A visual demonstration helps because you can see how one clean line turns an awkward gap into a snug fit.
That matters whenever you want your work to feel welcome in the room, not forced into it. Scribing gives you control, confidence, and a better bond between pieces, so your finished project looks calm, neat, and truly at home.
Tools You Need for Scribing
You’ll get the cleanest scribe lines whenever you use the right mix of tools, starting with a woodworking compass, a carpenter’s pencil, and a scrap wood block.
Then you can mark irregular walls, check your gaps, and keep your layout steady without fighting the material.
After that, your cutting and fitting tools help you trim the line and shape the final fit with confidence.
Essential Scribing Tools
A good scribing job starts with the right tools in your hand, because even a small gap can turn into a frustrating fit should you guess instead of measure.
You don’t need a huge kit, just the pieces that help you match the wall and keep your work confident. Start with these essentials:
- Woodworking compass for irregular profiles
- Carpenter’s pencil for tight gaps
- Scrap wood block for wider reaches
- Japanese incannel gouge for curved cuts
- Jigsaw for rough trimming
Whenever you choose tools, consider about material selection and the shape of the edge templates you’re tracing.
A steady hand feels easier whenever your tools fit the job, and that calm helps you belong in the shop, not fight it. Keep each tool ready, and the scribe line will follow your work like it was meant to be there.
Measuring And Marking Tools
Once you’ve got the right scribing tools in hand, the next step is choosing the measuring and marking tools that help you place each line with confidence. You’re not guessing here; you’re building dimension accuracy that makes the whole job feel calmer. A sharp carpenter’s pencil gives you clear, readable marks, while digital calipers help you check tiny spaces that a ruler could miss. Use a tape, square, and story stick to keep your layout steady and familiar.
| Tool | Why you use it |
|---|---|
| Carpenter’s pencil | Marks clean lines |
| Digital calipers | Checks exact gaps |
| Combination square | Sets true edges |
| Story stick | Keeps repeated marks consistent |
When you measure well, your scribe line feels less like a chore and more like part of the craft you belong to.
Cutting And Fitting Tools
Cutting and fitting tools turn a careful scribe line into a clean, snug joint, and that’s where the real shape of the job starts to appear. You don’t need a huge kit, but you do need the right ones close at hand.
- Jigsaw for rough cuts along your line
- Japanese incannel gouge for curved joinery
- Block plane for fine trim on edges
- Sanding block for smooth final fitting
- Power tools with ergonomic handles for steadier control
After you mark the profile, use the jigsaw to stay just outside the line. Then switch to hand tools for the last fit.
A plane or sanding block lets you sneak up on the wall or cabinet. Once the tool feels steady in your hand, you feel steadier too, and that makes the whole scribing task less stressful.
Set Up the Piece for a Tight Fit
Before you scribe, mark a clear reference edge so you know exactly where every check starts. Then measure the joint gap and make sure the workpiece sits firmly in place, because a loose setup can throw off your fit fast. Once the piece is steady, you can trust your marks and make small changes with confidence.
Mark Reference Edge
A good scribe starts with a steady reference edge, because that one clean line tells you where the piece should really sit. You mark that edge initially, then build your layout from it with calm, repeatable strokes.
Whenever you use reference templates, you keep the shape honest and help every mark stay true. Good edge alignment keeps the work from drifting, so your piece fits like it belongs there.
- Choose the most reliable side
- Hold the pencil flat and firm
- Keep your body square to the line
- Recheck your layout against the edge
- Mark only what guides the fit
If the stock feels awkward, breathe and reset your grip. That small pause saves a lot of awkward trimming later and helps you stay in the crew.
Check Joint Gap
Slide the piece into place and check the joint gap with care, because this is where a good fit starts to show itself. You’re not guessing here; you’re reading the joint like a map. Use fast inspection initially, then slow visual diagnostics to spot daylight, pinches, and uneven edges. In case one side opens more than the other, nudge the piece and look again.
| Gap look | What you see | What it means |
|---|---|---|
| Tight line | Bare shadow | Close fit |
| Small opening | Thin light | Needs trim |
| Uneven space | Wavy edge | Recheck alignment |
When you stay patient, you join the crew of careful fitters who trust their eyes and hands. A calm check now saves later fuss and keeps your work feeling solid.
Secure Workpiece Firmly
Clamp the workpiece steady, and you give your scribing line a fighting chance. You’re not just holding wood; you’re setting up a tight fit that feels clean and confident. Choose clamp placement so the jaws support the broadest face and stay clear of your marking path. Add pads or scrap blocks for vibration damping, because even a tiny wobble can blur your line and fray your focus.
- Check that the piece sits level before you tighten.
- Use two clamps whenever the board wants to twist.
- Keep the edge easy to reach with your pencil.
- Recheck pressure after the wood settles.
- Move your body, not the workpiece, while you scribe.
If the stock stays calm, you can trace the shape with more trust and less fuss.
How to Mark a Scribe Line
In that moment you need to mark a scribe line, start by holding the workpiece in its final position and checking that it sits level and plumb, because a small tilt can throw off the whole fit.
Then use your scribe technique with calm, steady hands so the line follows the surface, not your guess.
Keep your pencil placement tight against the wall or mating edge, and let the point stay on the face you’ll trim.
Should the gap be small, a carpenter’s pencil works well.
For wider gaps, add a scrap block to keep the mark true.
Move slowly, and keep your eyes on the contact point.
That way, you and the piece work together, and the fit feels like it belongs.
How to Scribe Uneven Walls and Floors
Uneven walls and floors can test your patience, but they don’t have to ruin the fit. You can still make the piece feel made for the room, not forced into it. Start by leveling the workpiece, then trace the wall or floor with a compass or pencil, keeping steady pressure and a calm pace.
- Slide shims underneath the base to hold level.
- Mark from a true reference line.
- Keep the tool straight for clean transfer.
- Check gaps near corners and tight spots.
- Save wood for later fitting.
When you scribe well, you reduce gaps that invite thermal bridging and weaken acoustical sealing. That means your trim, cabinet, or panel sits snug, and you feel like you belong in the finished space.
Cut the Scribe Line Cleanly
Once you’ve marked the scribe line, the next job is to cut it cleanly without spoiling the fit. You belong to this part now, so work slowly and let the blade follow the mark. A scribe router helps you stay true on long edges, while edge routing can ease tight spots near corners. Should the line curves, make a few light passes instead of one heavy cut. That keeps grain matching intact and reduces tearout.
For paint finishing, leave the edge crisp but not ragged, since rough fibers show fast. After the cut, pare tiny high spots with a sharp chisel or block plane. Keep your hand steady, trust the line, and you’ll get a neat edge that feels made for the room.
Test the Fit Before Installation
Before you lock the piece in place, test the fit slowly and with care so you don’t turn a good scribe into a bad day. You’re not alone in this step, and a few patient trial fittings can save your ego and your time. Set the part where it belongs, then check how it sits against the wall, floor, or partner piece. Use mock assemblies to see the whole scene before you commit.
- Slide the piece into position gently
- Look for tight contact along the scribe
- Check that the part sits square and true
- Move it in and out a few times
- Invite a helper to spot what you miss
When something feels off, pause and study it. That careful pause keeps your work steady and your crew confident.
Fix Gaps and High Spots
Now that you’ve checked the fit, you can tackle the small trouble spots that keep the joint from sitting clean and proud.
You belong here, and this fix is part of the craft.
Initially, mark each high spot with a sharp pencil, then shave it with a block plane or sand it lightly.
Next, ease the tight edge in small passes so you don’t chase the line too far.
Whenever you find a gap, check for wood expansion or thermal gaps, since both can change how the piece settles through the day.
Then recheck the contact along the full edge.
Should one side still rock, trim that side beforehand and test again.
Keep your touch calm, and the joint will start to feel like it was meant to live there.
Scribe Trim, Cabinets, and Countertops
Scribing trim, cabinets, and countertops starts with a calm, careful fit, because real walls and real floors are never perfectly straight. You measure the gap, hold your piece steady, and trace the wall with a pencil or compass. Then you cut a little proud, so you can sneak up on the fit with patience.
- Use shims to level cabinets before you mark.
- Keep trim tight, then scribe the true wall line.
- Check countertop edges for soft dips and humps.
- Add edge sealing after the fit feels right.
- Save decorative inlays for spots that stay visible.
When you work this way, the piece starts to feel like it belongs. You’re not forcing the room to change. You’re teaching your material to meet the space with grace.
Common Scribing Mistakes to Avoid
You can get a clean fit only whenever you read the wall profile correctly, so a sloppy trace can throw off the whole piece.
Should you ignore how wood moves with humidity, your careful line might still fail after installation.
And in case you don’t control your scribing tool well, you can cut a line that’s wavy, shallow, or just plain stubborn.
Inaccurate Wall Profiling
Even a small wall bump can throw off your whole profile, so the initial mistake to avoid is guessing where the wall really sits. You need to read the surface, not the paint, because measurement errors start once you trust a bowed edge. A quick compass pass helps you catch the true line before template distortion sneaks in and ruins the fit. Stay steady and check your work.
- Hold your tool square to the work.
- Mark from a clear reference line.
- Test both ends of the piece.
- Recheck tight spots before cutting.
- Keep the profile moving in one smooth path.
As you slow down, you protect the fit and feel like part of a crew that gets clean results.
Ignoring Material Movement
Wood can move after you measure it, and that’s where a lot of clean-looking scribe jobs go sideways. You can fit a cabinet perfectly in the shop, then watch it tighten or open up after seasonal movement hits.
Humidity effects matter too, because the same board can swell in summer and shrink in winter. So you need to leave a little room for that change.
Whenever you scribe trim, panels, or fillers, check the space with the room’s normal moisture level in mind. That way, your joint still looks tight later, not just on day one.
Should you plan for movement now, you join the crew that gets lasting fits and fewer headaches. A small gap today can save a loud crack tomorrow.
Poor Scribing Tool Control
Upon scribing goes wrong, the problem is often not the line itself but the hand holding the tool. A nervous hand can turn a clean profile into a wavy guess, and tool slippage makes that worse fast. You belong to the crew that slows down, braces the work, and lets the tool ride steady.
- Keep your wrist locked and move from your shoulder.
- Hold the compass or pencil with firm, even pressure.
- Check that the tip bites before you pull a line.
- Set both feet and your workpiece before you start.
- Regrip only once you stop moving.
Next, practice on scrap until your hand feels calm. Then your marks stay true, and your fit feels like it was meant to be there.
How to Scribe Faster and More Accurately
As you want to scribe faster and more accurately, the trick is to set yourself up before you even touch the wood. Initially, square your piece, then use a clear reference line so your marks stay true.
Next, keep your compass or pencil at a steady angle and move the workpiece, not your hand, whenever you can. That small shift increases speed techniques and keeps the line clean.
Then, use ergonomic grips so your wrist stays relaxed and your control stays sharp. Also, project from both ends whenever the gap is long, because that helps you keep the profile parallel to the wall.
Finally, check your fit once, adjust once, and trust the line. With practice, you’ll feel like you belong at the bench.
When to Use a Scribing Tool
You’ve already learned how to mark a clean line faster, so now it helps to know at what point a scribing tool is the right choice.
Use it whenever walls, floors, or trim won’t give you a straight, friendly fit. Provided the gap is too uneven for a pencil, reach for a compass or block. That choice protects your material selection and saves you from force-fighting the space.
- Match the tool to the gap size
- Keep the workpiece level and plumb
- Hold the tool perpendicular for a truer line
- Use ergonomic technique so your hand stays steady
- Leave extra wood for final fitting
Whenever you work this way, you join the crew of people who care about crisp edges and calm, confident results.
Frequently Asked Questions
How Do I Scribe Around Curved Surfaces?
Trace the curve with a compass or contour template pressed to the surface, then copy the shape with a flexible batten. Keep the workpiece steady, mark lightly, and the curved fit will come together cleanly.
Can I Scribe Without a Compass?
Yes, you can scribe without a compass by using freehand templates and shadow matching. Trace the wall with a pencil, then refine the line until the fit is clean and precise.
How Do I Scribe Inside Corners?
Hold the piece plumb, run a pencil or compass along the wall, and mark the corner profile on the material. For a snug fit, cope the joint, then file, plane, and test fit until the edge closes cleanly.
What Wood Species Are Easiest to Scribe?
Pine boards and cedar siding are the simplest to scribe because the wood is soft, easy to shape, and leaves a clean edge. You can adjust the fit quickly and work with more control on the job.
How Do I Scribe Painted or Finished Surfaces?
Protect the painted or finished surface with masking tape before marking it. Use a sharp pencil or compass to trace the line lightly, then cut slightly proud, test fit the piece, and trim the edge until it matches cleanly without damaging the finish.



