Address
304 North Cardinal
St. Dorchester Center, MA 02124
Work Hours
Monday to Friday: 7AM - 7PM
Weekend: 10AM - 5PM
Address
304 North Cardinal
St. Dorchester Center, MA 02124
Work Hours
Monday to Friday: 7AM - 7PM
Weekend: 10AM - 5PM

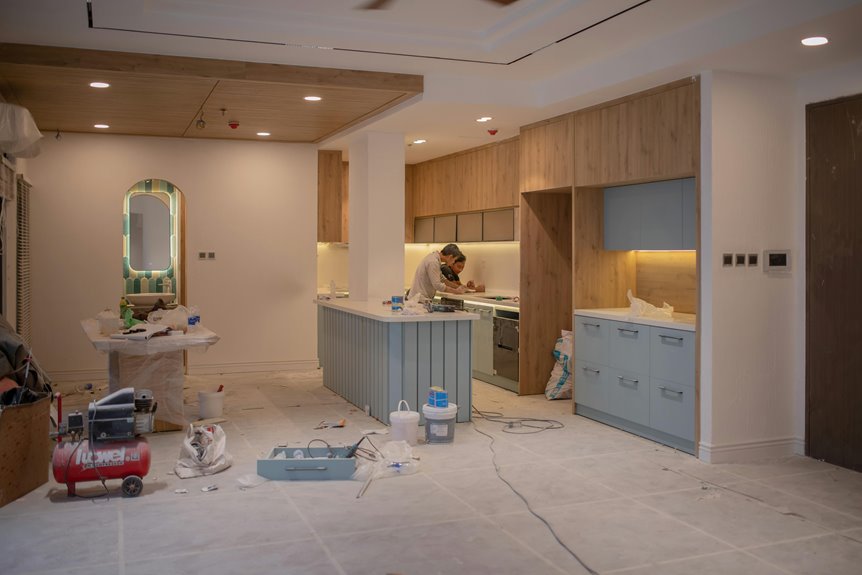
Installing a toe kick on kitchen cabinets can look tricky initially, but you can handle it with the right steps and a steady hand. Start measuring the full run, then mark any dips, bumps, or vent spots so nothing surprises you later. After that, you’ll cut the panels, test the fit, and shape them to match uneven floors. Once you see how the pieces lock in, the rest gets much easier.
Start measuring the full length of the toe kick area, because a good fit makes the whole job feel much easier. Then check the height and depth so your cabinet line stays even and your design aesthetics stay sharp. In case your floor isn’t perfectly level, leave a little extra for scribing.
Next, dry-fit the panel under the cabinets and make sure it sits snugly from end to end. Whenever you do this, you’ll also enjoy the ergonomic benefits later, since the recessed space gives your feet room while you work.
After that, attach the toe kick with your chosen clips or adhesive, pressing it firmly so it stays straight. Keep the piece aligned with the cabinet legs, and you’ll get a clean, finished look that feels like it truly belongs.
Before you start, gather the essential tools and materials so you can work without interruptions. You’ll want a miter saw or table saw, plus sandpaper, tape, and a screwdriver to help with clean cuts and easy placement. Then set out the toe kick panels, clips, adhesive, and nails so everything’s ready as you’re fiting the pieces under the cabinets.
Having the right tools and materials on hand makes toe kick installation feel far less stressful, and that little bit of prep can save you from awkward gaps and last-minute fixes. You’ll work cleaner whenever you choose a miter saw for short cuts, a table saw for long runs, painter’s tape for delicate edges, a flathead screwdriver for clips, and sandpaper for touchups. That mix supports toe kick ergonomics because you can shape parts that feel comfortable and sit right under the cabinets. It also helps with ventilation considerations, since neat cuts and snug placement leave fewer trapped spaces.
| Tool | Why you need it |
|---|---|
| Miter saw | Cuts angles cleanly |
| Table saw | Makes straight rip cuts |
| Sandpaper | Smooths rough edges |
Gathering the right materials makes toe kick installation go much smoother, and it can spare you from that annoying moment as a panel is almost perfect but not quite.
You’ll want MDF, plywood, or a matching veneer panel, plus adjustable clips or adhesive clips when your cabinets need them. Grab construction adhesive, 1-inch brad nails, and painter’s tape for cleaner cuts.
A miter saw, table saw, flathead screwdriver, and sandpaper help you shape and smooth each piece.
Before you buy, check your material choices against your cabinet finish and consider edge treatments, since those small details help the toe kick blend in.
In case your floor isn’t level, leave room for scribing so everything fits like it belongs there.
Start measuring the full cabinet run from one end to the other, because this length tells you exactly how much toe kick material you need.
You want a tape measure that stays straight, so check the line at each base cabinet and observe the total in inches.
Then look for spots where the floor changeover changes or the toe clearance feels tight.
Should the floor dip, add a little extra for scribing so the panel sits like it belongs there.
Keep your numbers clear, and write them down before you move on.
Whenever you measure carefully now, you make the next steps feel easier, smoother, and more like a team win in your kitchen.
Cut each toe kick piece to length with care, because a clean cut makes the whole cabinet line look polished and calm. You want each section to match the cabinet run, so mark every board before you cut. A miter saw works well for neat ends, while a table saw helps with long, straight slices.
Should you be using MDF, plywood, or veneer, place painter’s tape along the cut line to help reduce chipping. Then smooth rough edges with sandpaper so the pieces fit together like they belong there.
As you plan, consider paint options and decorative vents, since those details can shape the final look. Once each piece is ready, set it aside in order so you can keep the install moving without stress.
Before you set the toe kick in place, check the wall for straightness and see whether the floor stays level from end to end. Use your tape measure and a level to spot high and low areas, because even small bumps can throw off the fit.
Once you mark those trouble spots now, you’ll save yourself from gaps, rocking panels, and a lot of quiet frustration later.
Should your walls or floor aren’t perfectly straight, you’ll want to catch that now, not after the toe kick is already fixed in place. You deserve a fit that feels tidy and solid, and a quick wall plumbness check helps you get there. Look for drywall bowing, then hold a level or straightedge against the wall to spot gaps. In case the wall leans or dips, take note where it changes.
| Spot | What to See | What It Means |
|---|---|---|
| Left end | Tight fit | Good line |
| Center | Small gap | Mild bowing |
| Right end | Wider gap | Needs scribing |
Next, compare both ends of the cabinet run. Once you know where the wall shifts, you can trim the toe kick with confidence and keep the whole base line looking clean.
With the wall check done, turn your attention to the floor, because even a small slope can throw off the toe kick line. You’re not looking for perfection here, just a clear read on floor variance across the cabinet run.
Set a long level or straightedge on the floor and move it along the area where the toe kick will sit. Should you spot gaps, observe how the surface changes from one end to the other. That helps you choose leveling strategies that fit the space and keep the base looking built-in, not wobbly.
A steady floor check also gives you confidence, because you’ll know where the cabinet line needs support before you move ahead. In a busy kitchen, that calm step saves you from future fuss.
As you mark the high and low spots, let the floor and wall tell you where the trouble starts. Do a careful visual inspection with a straightedge, level, or scrap board, and trace each dip, bump, and bow with pencil.
Whenever you spot uneven flooring, mark the highest point initially, then record the lowest areas beside it. Next, check the wall line too, because cabinets can hide small twists that still throw off your toe kick.
These marks help you plan scribing later, so the piece fits with less stress and fewer gaps. Take your time here. You’re not being picky, you’re setting up the whole run to sit snug and look like it belongs there, just like the rest of the kitchen.
Start alongside building a solid toe kick frame that matches your cabinet run, because a good fit here saves you a lot of frustration later. Lay out your frame assembly with straight support rails, then add internal bracing where the span feels weak. Use recessed cleats at the back so the frame sits tight and still leaves room for adjustment. Check your measurements twice, especially the height and depth, so the whole run feels like one team.
| Part | What you do | Why it helps |
|---|---|---|
| Rails | Cut to length | Keeps the line true |
| Bracing | Fit inside corners | Adds strength |
| Cleats | Set back from edge | Helps alignment |
Dry-fit each piece under the cabinets, then tweak until the frame feels snug and steady. That’s how you build confidence before moving on.
Next, you’ll measure each toe kick panel so it fits the cabinet run without gaps or overhang.
Then cut the pieces to size, leaving a little room in case the floor isn’t perfectly level.
After that, you’ll dry-fit the panels and secure them with clips so everything lines up cleanly.
Measure the toe kick panel length with care, because this one step sets the tone for the whole install.
You want each panel to match the cabinet run, so check the full span from end to end.
Should the floor slope change, observe it now, since the panel might need a little extra room for a clean fit.
Also, keep material tolerance in mind, because MDF, plywood, and veneer can vary just enough to matter.
As you measure, mark both ends clearly and compare them against the cabinet legs. That quick double check helps you stay in sync with the space and with the rest of the crew.
Once the numbers feel right, you can move ahead with confidence and keep the trim line looking neat.
Now trim the toe kick panels to fit the cabinet run with care, because a clean cut makes the whole job feel smoother.
You’ll want to mark each piece, then cut slowly with a saw that gives you straight edges.
Should the floor dips, leave a little extra so you can scribe it later.
For veneer panels, tape the cut line first to help prevent chips and save paint touchups.
Check for vent access before you finish each panel, so airflow stays open and the cabinet base still looks neat.
After each cut, sand the edges lightly and dry-fit the panel under the cabinets.
That quick check helps you feel confident, because everything sits where it should and your kitchen starts to look like it belongs together.
Slide the clips into place and let the toe kick start to lock in. You’ll feel the panel meet the cabinet legs, and that snug fit gives your kitchen a polished, welcoming look.
Press each clip until it clicks, then check that the panel sits straight from end to end. Should the floor’s a little uneven, a quick scribe trim helps the fit stay tidy.
For removable panels, keep the clips aligned so you can lift the toe kick off later without a fight. That makes cleanup and future repairs easier for everyone in the house.
Do a fast clip maintenance check now and then, and tighten any loose spot before it grows into a wobble. With steady pressure, you’ll finish the job and join the crew of cabinets that look built-in.
Once the toe kick panels are in place, you need to seal the seams and gaps so the whole base looks neat and stays protected. Use a thin bead of caulk along every joint, then smooth it with a damp finger for a tight moisture barrier. That small step helps with thermal expansion, so the panels can move a little without splitting. Choose a product with paint compatibility should you plan to finish later, and pick a flexible line that adds acoustic insulation too.
| Gap | Feeling |
|---|---|
| Tight seam | Calm |
| Clean edge | Satisfaction |
| Sealed base | Belonging |
You’re not just closing openings. You’re giving your kitchen a cared-for look that feels like it belongs with the rest of your home.
A neat seal is only part of the job, because the toe kick also needs to look like it came with the cabinets from the start. You can make that happen with careful finish matching, so the panel shares the same color, sheen, and texture as the base cabinets.
Should your cabinets have wood grain, line up the grain alignment so the toe kick flows naturally across the run. Then step back and check the edges in real light, because your eye catches differences fast.
You can also soften cut edges with light sanding, then touch them with stain, paint, or veneer tape. Once you blend the toe kick well, the whole kitchen feels finished, connected, and ready to welcome you home.
Should your toe kick look crooked, gaps show up, or the panel keeps shifting, don’t worry because these problems are common and fixable. Initially, check the cabinet legs and do an alignment correction by loosening the clips, then press the panel back into place. In the event the floor is uneven, add a small scribe cut so the edge sits flush.
Next, tighten the panel with brad nails or fresh adhesive, but don’t force it, since that can split the board. Should you hear rubbing or feel trapped air, review ventilation considerations so the space stays practical. Also, make sure the toe kick height and depth match the cabinet run, because small measurement errors often cause big headaches. With a careful reset, you’ll fit right in with a clean, steady finish.
Now that your toe kick sits straight and snug, you can keep it looking sharp with a little simple care. Wipe it with a damp cloth, then dry it fast so moisture doesn’t sneak in. Use gentle cleaner for everyday material maintenance, and skip harsh scrubbers that can dull veneer or dent MDF.
Should you spot swelling or loosening, act quickly so the panel stays part of your kitchen crew. A little attention keeps the base line neat, protects the cabinet legs, and helps your space feel welcoming every day.
You’ll remove the panel by finding the hidden screws or clips, then easing it loose with a pry bar; once the damaged piece is off, you can replace it with a clean new panel that fits your kitchen.
Yes, toe kicks can be added to floating bases if you use hidden fasteners and make sure the base can support the extra trim. This gives the cabinets a clean, built in appearance while still allowing easy access.
For ADA compliance, a typical cabinet height is 34 inches with a 30 inch knee clearance, which keeps the toe kick low enough for comfortable access.
No, toe kick clips are not compatible with every cabinet brand. Check the brand specifications and clip type first, because leg slots, mounting systems, and dimensions can vary. Always confirm compatibility before buying or installing.
Take a paint chip to the veneer supplier, compare the color under your kitchen lighting, and line up the grain direction with the cabinet faces. This helps the toe kick blend in cleanly and look thoughtfully matched.




