As you set a 36-inch vanity beside a tight wall and the door keeps brushing it, the fix starts with careful measuring, not guesswork. You’ll mark the centerline, check the floor, and make room for plumbing before you slide it into place. Once you know what fits, you can level it, anchor it, and finish the gap cleanly, so the whole setup feels solid and looks built for the room.
Choose the Right Freestanding Vanity Spot
A smart vanity spot starts with the room itself, and that little bit of planning can save you a lot of headache later. You want a place that feels open, easy to reach, and natural to use every day. Check the door swing initially so the vanity won’t crowd the path or catch as you walk in with wet hands.
Then look for ventilation considerations, because a spot near steady airflow helps the room feel fresher and keeps moisture from lingering. You also want enough breathing room around the vanity so the area doesn’t feel cramped. Pick a location that supports your routine, leaves space to move, and makes the bathroom feel like it belongs to you, not the other way around.
Measure Wall Space and Plumbing Lines
Start beside measuring the wall space where your vanity will sit, so you know it fits without crowding the room.
Then check where the plumbing lines come out of the wall, because those spots decide how the back of the vanity needs to line up.
A careful tape measure now can save you from a wobbly setup and a few unhappy surprises later.
Wall Space Measurements
Before you move the vanity into place, measure the wall space carefully so you know exactly what you’re working with. This step helps you protect measurement accuracy and keep the fit calm and clean. Check the full width, then record the vertical clearance so the vanity won’t crowd trim or feel squeezed.
- Measure from corner to corner at the height where the vanity will sit.
- Mark the center point, so you can stay aligned and feel confident about placement.
- Compare the wall opening with the vanity size, and leave a small gap for easy adjustment.
When you take your time here, you set yourself up for a smoother install and a space that feels like it truly belongs to you.
Plumbing Line Locations
Once you know where the vanity will sit, you need to map out the plumbing line locations with care. You’re not guessing here; you’re helping the room work for you. Start upon checking the drain, hot, and cold supply lines, then compare them to the vanity’s back opening. Good pipe mapping keeps you from forcing pipes into the wrong spot later.
Should your vanity has a solid back, mark where you’ll need cutouts or access panels for easy reach. Measure from the wall, not just the floor, because small shifts can throw everything off. Then confirm the lines leave enough room for fittings, shutoffs, and future service. Whenever you plan this well, you join the bathroom to the vanity, and the whole setup feels calm, tidy, and ready.
Pick a Vanity That Fits the Wall
A vanity that fits the wall well makes the whole bathroom feel calmer and easier to use. You want its width to match the wall without crowding trim, outlets, or nearby doors. Choose a style that feels like it belongs in your space, not one that fights it. Strong material durability helps the piece stay handsome through daily use, and decorative hardware can echo your room’s tone.
- Measure the wall span initially, then compare it with the vanity case.
- Check door swing and side clearance so the fit feels natural.
- Pick proportions that leave room for the top and a neat edge.
That little bit of planning helps you avoid a cramped look and gives you a setup that feels welcoming from the start.
Confirm the Floor Is Level and the Wall Is Plumb
Even in case you’ve picked a vanity that fits the wall beautifully, the room can still throw you a curveball in case the floor slopes or the wall leans. So, before you move it in, grab a level and check the spot from left to right and front to back. Should the floor slope tilts, you can use shims later to steady the base.
Then check wall alignment by holding the level straight against the surface. A wall that bows a little isn’t rare, and you’re not alone were you discover it. Small gaps can happen, yet now you’ll know where they are. That simple check helps you place the vanity with confidence and keeps the whole setup looking calm, neat, and meant to be there.
Prep the Bathroom Wall Surface
Initially, wipe the wall clean so dust and grime don’t throw off your vanity’s fit.
Then check the surface for bumps, dips, or rough spots that could keep it from sitting flush.
After that, mark the vanity’s outline on the wall so you know exactly where it needs to go.
Clean Wall Surface
Before you set the vanity in place, clean the bathroom wall surface so it can sit flat and secure without any concealed bumps getting in the way.
You’ll feel more confident once the area looks fresh and cared for, and that care shows in every step you take.
Use this quick routine for dust removal and mildew prevention:
- Wipe the wall with a damp cloth to lift loose debris.
- Mix a mild cleaner with warm water and scrub away soap film.
- Dry the surface fully with a clean towel.
After that, check corners and seams for sticky spots, then clear them too.
A clean wall helps you create a tidy fit, and it makes your bathroom feel more welcoming for the whole space.
Check Wall Flatness
A wall that looks smooth can still hide small waves, dips, or bumps that throw your vanity off balance. You can catch those surface irregularities now, before they turn into headaches later.
Hold a long level or straightedge across the wall and watch for gaps. Should you spot a hollow or high spot, mark it and plan a fix with patching compound or light sanding.
Also, do moisture testing in any area that feels soft, cool, or recently repaired, because concealed dampness can weaken your setup.
As you check, trust your eyes and hands. Were the wall to feel uneven, it probably is. Taking this step helps you feel confident, and your vanity gets the steady support it needs to sit neatly and stay put.
Mark Vanity Position
Now mark the vanity’s exact location on the wall so the rest of the install stays calm and controlled.
Use your tape measure to find the center point, then compare it with nearby measure landmarks like corners, outlets, and plumbing lines.
With a pencil, place clear alignment marks for the vanity edges and top line. This gives you a simple visual guide, and it helps your setup feel steady and shared with the room.
- Check the width twice so your marks match the vanity, not your guess.
- Keep the marks light, clean, and easy to see.
- Step back and confirm the vanity will leave room for airflow and future access.
If the wall already feels patched and painted, these marks make the next move smoother and less stressful for everyone.
Position the Freestanding Vanity
Slide the freestanding vanity into place with care, because that initial move sets the tone for everything that follows. You’re not just setting furniture down; you’re creating a calm, usable nook that feels like it belongs in your home.
Keep the front edge square to the wall, then check the sides so the cabinet sits evenly. This step supports space optimization, because a clean fit opens the room and keeps traffic easy. It also follows smart installation sequencing, since proper placement makes later fitting smoother.
Should the floor feel uneven, nudge the legs until the vanity rests steady and secure. Take a breath, make small adjustments, and trust your eyes. Once it looks right and feels solid, you’re ready for the next part.
Mark Plumbing Openings and Clearances
With the vanity resting in the right spot, you can start marking where the plumbing will pass through so the cabinet fits cleanly and nothing gets forced into place.
Use a tape measure and a pencil, then check pipe alignment from the wall to the cabinet back.
Should your layout feel tricky, cut paper clearance templates initially and test them against the drain and supply lines. That small step can save you from a crooked opening and a big sigh later.
- Mark the drain centerline on the vanity back.
- Trace supply lines with a little extra room.
- Double-check each opening before you cut.
Keep the marks clear, and you’ll feel more at ease as the vanity slides into place.
Small careful steps like these help your space look neat and feel welcoming.
Anchor the Vanity for Stability
Next, you’ll lock the vanity in place with wall anchoring brackets so it won’t shift whenever you use it each day. Check that it sits flat on the floor initially, because even a tiny wobble can turn into a bigger problem later.
Then fasten it into the studs with the right screws, and you’ll give it the steady support it needs.
Wall Anchoring Brackets
Should your vanity feels even a little wobbly, wall anchoring brackets can make all the difference. You’ll feel better whenever you tie the cabinet to studs with concealed fasteners, because the setup looks clean and stays secure. Choose brackets with corrosion protection so bathroom moisture won’t wear them down fast. Then line up the vanity, mark the bracket spots, and drive screws straight and snug.
- Check that the bracket sits flush behind the frame.
- Use hardware sized for your vanity’s thickness.
- Tighten each point until the cabinet feels steady.
With these small steps, you help your space feel polished and welcoming, like it truly belongs in your home.
Floor Stability Check
Before you lock the vanity in place, do a floor stability check so the cabinet won’t rock, tilt, or stress the plumbing later. Stand near each corner and press down gently. Should you feel movement, fix the floor first.
Check floor leveling with a long level, then slide shims under the legs until the vanity sits steady. Tighten the feet again and test all sides. Should the floor still dip, you might need subfloor reinforcement before you add the top.
That step can feel annoying, but it saves you from wobbles and leaks later. Once the base feels solid, you’re creating a safer fit for your space and everyone who uses it. A steady vanity helps the room feel calm, finished, and ready for daily life.
Connect the Sink, Faucet, and Drain
Now it’s time to hook up the sink, faucet, and drain so your vanity can actually do its job. Start thereafter setting the faucet in place and checking Faucet alignment before tightening the nuts. Then connect the supply lines and make sure they sit without twisting. Next, fit the drain assembly and watch the P trap routing so the pipe lines up cleanly with the wall outlet.
- Dry-fit every part initially.
- Tighten fittings thereafter hand, then give a small final turn.
- Run water and look for drips around each joint.
You’re not doing this alone. Take your time, stay calm, and trust the setup. Whenever each piece fits right, your vanity feels solid, and the whole bathroom starts to feel like yours.
Seal Gaps for a Clean Finish
A clean seal around the vanity makes the whole room look finished, and it also helps keep water from sneaking into gaps.
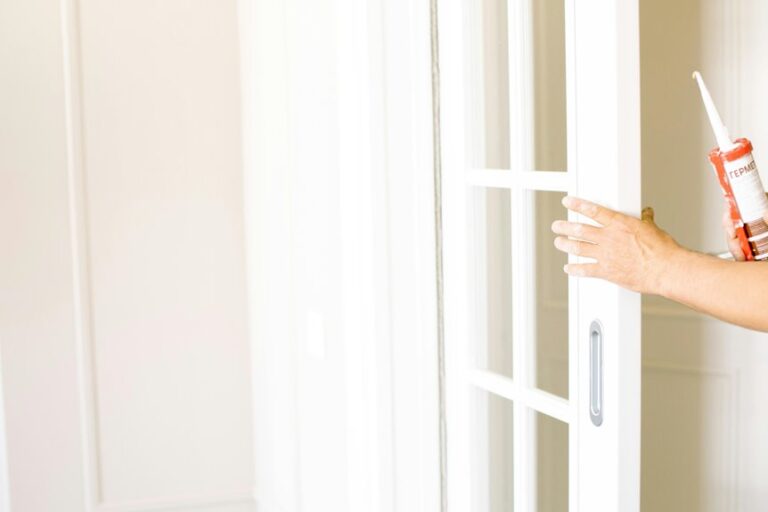
You should run a steady bead of caulk where the vanity meets the wall, then smooth it with a damp finger or finishing tool.
Should the opening be wider, choose trim options that cover the edge neatly and match your style.
Before you seal, check for dust and make sure any moisture barriers are in place behind the vanity.
That small step protects the wall and gives you more peace of mind.
Work slowly, because neat lines make the vanity feel built in, not just placed there.
Whenever you wipe away extra caulk right away, you keep the finish crisp and welcoming.
Organize Vanity Storage and Styling
Keep your vanity calm and useful alongside grouping drawer items by how often you reach for them, so you can grab what you need fast.
Then balance the countertop with just a few styled pieces, like a soap dispenser or small plant, so it feels neat instead of crowded.
You can also hide extra supplies in baskets, trays, or built-in compartments to keep the wall-side setup looking tidy and easy to use.
Drawer Organization Tips
Frequently, the best vanity drawers start with a simple reset, and that means giving every inch a job. You can make your space feel calm whenever you sort items according to use, not according to habit. Start with these three moves:
- Place daily essentials in shallow, easy-reach sections.
- Use deep trays for taller bottles and backup supplies.
- Add vertical dividers to keep brushes, razors, and tools standing neat.
Next, group similar items together so you aren’t hunting before work. Keep one drawer for skin care, one for grooming, and one for extras.
Also, leave a little breathing room so each item slides back easily. Whenever your drawers stay clear, your vanity feels friendlier, and you do too.
Countertop Styling Balance
Now that your drawers have a clear job, your countertop can do the same without turning into a catchall. You don’t need much to make it feel calm and welcoming.
Start with one tray for daily essentials, one soap dish, and one small plant or candle. Then leave open space so the surface can breathe. This keeps your routine easy and your vanity from feeling crowded.
Use material contrast to add interest, like a warm wood tray on a cool stone top or a glass jar beside matte metal. Also, choose edge treatments that echo the vanity lines, since soft curves or crisp corners can tie everything together.
Whenever each piece feels chosen, your bathroom looks cared for, not staged, and you’ll feel right at home.
Hidden Storage Solutions
Tuck the clutter out of sight, and your vanity starts to work harder for you. You can make that space feel calm and welcoming through using concealed compartments that keep daily items close but unseen. Whenever you add slide out trays, you’ll reach hair tools, cotton pads, and backups without digging through a messy drawer.
- Use drawer dividers to sort small items.
- Keep one tray for morning routines.
- Reserve a concealed shelf for extra tissue and soap.
Because your vanity sits against the wall, every inch matters, so choose storage that opens smoothly and stays neat. You’ll enjoy a cleaner look, and your bathroom will feel like it belongs to you, not to clutter. Little upgrades like these make shared spaces feel more personal and easier to use.
Plan for Outlets, Lighting, and Mirrors
Before you set the vanity in place, plan where the outlets, lighting, and mirrors will go so everything works together, not against you.
Check outlet placement promptly so cords stay concealed and your daily routine feels easy. You’ll want each outlet close enough for a hair dryer or charger, but still safe and neat.
Then consider lighting. Place sconces or overhead light so your face gets even light, not harsh shadows that make morning tasks feel harder than they should.
Next, match mirror height to the vanity and to you, so the view feels natural for everyone who uses the space.
Once these pieces line up, your bathroom feels more open, more polished, and more like it truly fits your home.
Prevent Common Placement Mistakes
Even a small placement mistake can make your vanity feel crooked, crowded, or hard to use, so it helps to slow down and check the details that matter most. You’ll feel more at ease provided you treat the setup like a shared win for your whole space.
- Start with measurement checks before you mark the floor or wall.
- Leave room for doors, drawers, and plumbing so nothing bumps later.
- Choose adhesive selection that matches the surface, so small shims stay put assuming you utilize them.
Next, compare the vanity to nearby tiles, outlets, and trim. That keeps the look clean and the fit comfortable. Should something seems off, adjust now. A few careful moves today can save you from that lopsided, “why is this so tight?” feeling tomorrow.
Keep the Freestanding Vanity Stable
A level floor and a careful layout go a long way, but a freestanding vanity still needs steady support so it doesn’t wobble every time you grab the handle. You can give it that support through checking the feet, then slipping rubber pads under any leg that shifts.
After that, use shims until the cabinet sits square and firm. Should your model allow it, install anti tip kits and anchor the back to a stud for extra peace of mind.
Next, tighten every screw again after the top goes on, since weight can nudge the frame out of line. Finally, press on each corner and adjust once more.
Once the vanity feels solid, your bathroom feels calmer too, and that little win makes the whole space feel more like yours.
Frequently Asked Questions
Do I Need a Permit to Move a Bathroom Vanity?
Usually, moving a bathroom vanity does not require a permit. If the project involves relocating plumbing or adding electrical work, a permit is often required. Check your local building code and ask a licensed contractor before starting so the work meets all requirements.
Can I Place a Freestanding Vanity Over Heated Flooring?
Yes, you can set a freestanding vanity over heated flooring if you protect the heating system, leave proper clearance, and follow the manufacturer’s instructions. Heated membranes and floor sensors help provide warmth while reducing the risk of damage or uneven heat.
How Much Weight Can the Vanity Top Safely Support?
The vanity top can hold only the load listed by its maker, which is usually a moderate amount. Check the rated capacity, place items so the weight is spread out, and do not sit or stand on the surface.
Should I Install a Backsplash Behind a Wall-Adjacent Vanity?
Yes, you should if you want added splash protection and a cleaner finished look. Choose tile, stone, or a solid surface, and match the backsplash style to your vanity so the space feels coordinated and complete.
What Maintenance Keeps the Vanity Finish From Water Damage?
Protect the vanity finish by wiping up spills right away, maintaining intact caulk, and reapplying sealant around the edges when needed. Improve airflow with a fan or an open door, and avoid soaking the vanity while cleaning.