In case your French door panels have started to crumble, you don’t need to panic or replace the whole door right away. You can find the soft spots, cut back to solid wood, and rebuild the damage with epoxy that bonds tightly and shapes well. Then you can sand, prime, and seal the repair so it blends in and stands up to weather. The key is being aware where to stop cutting and how to rebuild without losing the door’s clean lines.
How Do You Spot French Door Rot?
Start near looking closely at the door panel, because rot usually gives itself away in case you know where to check. You can spot it by pressing along the lower rails, corners, and edges. In the event the wood feels spongy, note those soft spots right away. Then look for surface staining, dark patches, peeling paint, or a fuzzy look that signals moisture trouble.
Next, tap the panel lightly with your knuckle. A dull sound often means damage under the finish. After that, check the frame and jambs for cracks, mold, mildew, or rust stains. Should the problem stay shallow, you might only need a repair. But in the event the wood feels weak through the panel, you’re likely facing deeper decay and should keep moving carefully.
Gather Tools and Materials
Before you start fixing rotted French door panels, gather the right tools so the job feels a lot less messy and a lot more doable.
You’ll want basic repair tools like a putty knife, chisel, sandpaper, and a multi-tool, plus epoxy or wood filler for rebuilding damaged spots.
Don’t forget safety gear like gloves, a dust mask, and eye protection, because old rot can hide mold and grit that you really don’t want on you.
Essential Repair Tools
Gathering the right tools makes French door panel repair much less stressful, because you can work steadily instead of stopping every few minutes to hunt for the next item. You’ll feel more confident whenever you set out a pry bar, putty knife, chisel, hammer, sanding block, dust mask, gloves, tape, and a flashlight.
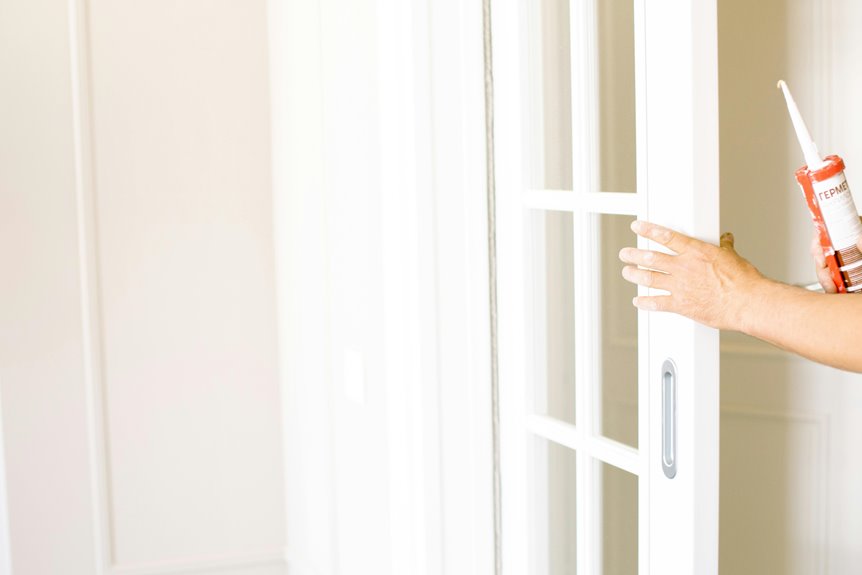
Keep paint brushes ready for primer and finish, and have caulk guns nearby for sealant so you can move from one step to the next without frustration. A utility knife helps with trim, while a shop vacuum keeps the workspace clean and safer for everyone in the house.
Provided you sort everything before you begin, you’ll save time, avoid mix ups, and join the repair feeling prepared instead of swamped.
Wood Filler And Epoxy
Once you’ve got your tools laid out, the next step is picking the right filler and epoxy so the repair actually lasts. You want a filler that bonds tight, sands smooth, and blends with the door’s profile. Check epoxy compatibility before you buy, because not every product plays nice with every resin.
Should the panel have shallow damage, a spreadable wood filler can help you rebuild small edges. For deeper rot, choose a two-part epoxy that sets hard and stays stable. Then consider grain matching, since the patch should feel like part of the same door, not a loud guest at the party. Keep your materials close, read the label, and match the product to the decay so your fix feels solid and looks natural.
Safety Gear And Supplies
Smartly, the right safety gear and tools make this repair feel a lot less risky and a lot more manageable. Before you start, gather gloves, a dust mask, and sturdy work clothes so you can handle moldy scraps without worry. For respirator selection, choose one rated for sanding and decay dust, and pair it with eye protection that seals well. You’ll also want a putty knife, chisel, hammer, oscillating tool, 100 to 220 grit sandpaper, rags, cleaner, epoxy, adhesive, clamps, and painter’s tape.
| Item | Why you need it | Tip |
|---|---|---|
| Respirator | Blocks dust and spores | Check the fit |
| Eye protection | Shields chips and grit | Keep lenses clean |
| Gloves | Protects your hands | Use a snug pair |
With these supplies ready, you can work with confidence and keep the job moving smoothly.
Can You Repair the Damaged Panel?
You can often repair a French door panel provided the damage stays shallow and the wood still feels solid around it.
But in case you find soft spots, deep rot, or broken structure, you might need to replace more than the panel. Checking the panel’s strength now helps you avoid a patch that won’t hold up later.
Assess Panel Damage
Before you start cutting or filling anything, take a careful look at the French door panel and decide how far the rot has gone. Feel the wood for soft spots, and observe any paint failure that’s letting water in. Use moisture mapping through checking darker stains, swollen edges, and damp seams around the panel and frame. Then inspect the jambs and nearby trim for mold, mildew, algae, or rust, because those clues often show the concealed path of damage. Should the wood feels firm and the decay stays near the surface, you’ve likely got a manageable problem. In the event the rot has spread through the panel, you’ll see crumbling fibers, deep softness, and weak edges. Take your time here. You’re not alone, and a clear assessment makes the next step much easier.
Repair Or Replace
Should the damage be still local and the panel keeps its shape, you can often repair it instead of replacing the whole door. You’ll save time, keep the original look, and stay in the same neighborhood of your budget.
A quick cost analysis helps you compare epoxy, filler, and labor against a new panel. In case the rotted area is small, repair usually wins.
Provided you want fresh design alternatives, you can also match the original style with a newer insert or trim detail. Once you choose repair, you keep the door that already fits your home and your taste. That matters whenever you love the character of your French doors and want to protect it without starting over.
Check Structural Integrity
Run your hand over the panel and look closely for more than surface rot, because that’s what tells you whether the door still has fight left in it. You need a clear structural assessment before you patch anything. In case the wood feels spongy near joints, the damage might be too deep for a simple fix.
Check frame alignment next, because a twisted frame can throw off load distribution and strain the panel every time you open the door. Then do a threshold inspection for soft spots, leaks, or gaps that keep feeding moisture.
Should the panel stay firm, the edges hold shape, and the rails still meet cleanly, you can usually repair it with confidence. When you see sagging, cracking, or separation, you’re probably coping with a bigger job than a quick rescue.
Remove the Damaged Panel Sections
Once you’ve found the rotted area, the next step is to remove every weak section so the repair can bond to solid wood. You’re not tearing the door apart; you’re making room for a clean, lasting fix. Work slowly, and keep your cuts tight around the damaged zone. Should you be adding moisture barriers later, this clean edge helps them seal better and reduces thermal bridging through the panel.
| Step | What You Do | Why It Helps |
|---|---|---|
| Mark | Trace the bad wood | Keeps you precise |
| Test | Press with a tool | Finds concealed softness |
| Trim | Lift loose edges | Stops rot spread |
| Clear | Remove dust and flakes | Improves bonding |
| Check | Feel for solid wood | Confirms your work |
You’ll feel more in control once the weak parts are gone, and that’s a good place to be.
Cut Out the Rotten Wood
Cut into the rotten wood with care, because this is where the repair starts to feel real.
You’ll want to measure depth initially, so you know how far the damage runs and where the solid edge begins.
Then make precise scoring along your marked lines with a sharp knife or utility blade. This helps keep the cut clean and gives you control, not guesswork.
Work slowly, and let the tool do the job while you guide it.
Should the wood crumbles, keep trimming until you reach firm material that feels steady under pressure.
You’re not just removing bad wood here; you’re making space for the panel to belong again.
A careful cut now saves you from a wobbly fix later.
Rebuild the Panel With Epoxy
Mixing epoxy is where the repair starts to take shape, and it can feel a little intimidating initially, but you’ve got this. Measure the two parts exactly, then stir until the color looks even.
You want a thick paste that stays put in the damaged panel. Press it into every void so no soft edge remains. Work in small sections, because that keeps you in control and helps the repair feel less messy.
Should the opening be deep, build it up in layers and let each one set. This is also where epoxy veneering can help you bridge thin spots cleanly.
For wider cosmetic areas, use decorative inlays only after the base cures. Smooth the surface with a putty knife, and keep your focus on a solid, friendly fit.
Recreate Missing Panel Details
A few small details can make the whole repair look like it never happened, and this is where you bring the missing panel shape back to life.
You can trace the intact side of the door, then copy its curves, grooves, and corner breaks onto your repair. Use pattern matching to keep both panels looking like twins, not cousins.
Should a bead or recess be gone, mark it with a sharp pencil and build it back with careful cuts and light shaping. Decorative routing helps you restore the profile so the eye reads one clean line across the door.
Work slowly, check both sides often, and trust the original design. Once you match the details well, your door feels whole again, and so do you.
Sand, Prime, Paint, and Seal
Once the repaired wood feels solid, you can move into the finish work with a lot more confidence. Start by sanding the patch with 100 to 120 grit until it blends with the door. Wipe away every bit of dust, then brush on exterior primer alongside steady brush techniques so the edges disappear. After that, add your paint or stain in thin coats, letting each layer dry fully.
| Step | Tool | Result |
|---|---|---|
| Sand | Block | Smooth edge |
| Prime | Brush | Sealed grain |
| Paint | Roller | Even color |
| Seal | Caulk | Blocked moisture |
| Dry | Air | Ready door |
Finish with weatherproof coatings around joints and exposed seams. You’re not just fixing a panel, you’re bringing your door back into the home you share.
Frequently Asked Questions
How Long Should Repaired French Doors Cure Before Normal Use?
Wait at least 24 to 48 hours before using the doors normally. If epoxy, adhesive, or paint is still curing, allow more time. This helps preserve finish adhesion, prevent damage, and keep traffic safe.
Can Wood Filler Replace Epoxy for Deep French Door Rot?
No, wood filler alone will not handle deep rot. Epoxy is needed to strengthen the damaged wood, while wood putty or grain filler only covers shallow defects, so the repair can still fail and lead to costly fixes.
What Humidity Level Prevents Future French Door Rot?
Keep indoor humidity around 30 to 50 percent, ideally 40 to 45 percent, to help prevent future French door rot. Use consistent ventilation to keep moisture from lingering and protect the wood.
Should Rotten French Doors Be Repaired or Fully Replaced?
Repair them if the rot is confined to one area, but replace them when decay has spread or weakened the frame. Consider cost and historic preservation: keep sound panels where possible, but choose full replacement when safety and durability require it.
How Do You Match Old Paint on Repaired French Panels?
You can match it by lifting a hidden chip, sampling the color, and comparing sheen beside the repaired panel. For instance, test three swatches until one blends in, then apply the chosen finish with confidence.