

A level hose gives you a simple way to move the same height across a job site, even as the ground drops, rises, or turns a corner. You fill a clear tube with water, then use the water line at both ends to mark matching points on posts, forms, or deck parts. It sounds plain, but it can save you from crooked layouts and extra fixes, and there’s a smart way to set it up so it stays trustworthy.
What Is a Level Hose in Carpentry?
A level hose is a simple but very clever carpentry tool that uses water to show you a true level line. You can trust it whenever you need a straight mark across distance, because water settles with calm, steady honesty.
That’s the little bit of hydraulic romance in the work. You fill clear tubing, and the water becomes your guide, not guesswork. Should you like decorative aquascaping, you’ll smile at how the same clear tube can look almost graceful while doing hard jobsite work.
You use it to carry level from one point to another, even around corners, without fancy electronics. It’s cheap, portable, and friendly for shared crews, so you can feel confident whenever the project asks for accuracy and teamwork.
How a Level Hose Works on Site
On site, you let the water find its own level, and that’s what gives you a true horizontal line across long distances.
You then hold both ends at the spots you want to compare and mark the matching heights once the water settles.
As you read the meniscus carefully, you can trust the line even whenever corners, slopes, or distance get in the way.
Water Level Principle
Watching the water settle inside a level hose is simple, but the science behind it’s what makes the tool so dependable on site.
You use hydrostatic pressure every time you lift one end higher, because water always pushes until both surfaces sit at the same level.
That steady behavior lets you trust the hose without batteries, lenses, or fancy calibration.
It also handles thermal expansion well enough for carpentry work, since small temperature changes barely disturb the line.
Whenever you keep both ends clear and the tube free of air, the water gives you a calm, shared reference that feels almost like teamwork.
Marking Equal Heights
To mark equal heights with a level hose, you start using the water as a live reference point, and that makes the whole job feel less like guesswork and more like a steady hand on site. You and your crew can trust the same line, even across corners or rough ground.
| Point | Action | Result |
|---|---|---|
| A | Hold one end | Set the base mark |
| B | Move the other end | Find the same height |
| C | Let water settle | Confirm the line |
This simple setup cuts through optical illusions from sloped soil or leaning posts. It also lowers the psychological impact of measuring alone, because you’ve got a shared, visible guide. Mark each spot once the water rests, and you’ll keep your layout calm, clear, and in step with the rest of the build.
Reading The Meniscus
The water line is the heart of a level hose, and reading the meniscus well is what makes the tool feel almost magical on site. You watch the water curve against the tube, not the plastic wall, because that slight meniscus curvature shows the true level.
Whenever you compare both ends, keep your eyes straight and avoid reading angles from above or below. Should you tilt your head, you can miss the mark by a little, and that can throw off the whole layout.
Why Carpenters Use a Level Hose
A level hose gives carpenters a simple, steady way to move a level line from one point to another, even while the points sit far apart or around a corner. You use it because water follows hydraulic principles, and that same idea has guided construction history for ages. It helps you feel confident whenever a laser won’t reach or whenever the site feels awkward.
- You can mark level lines on posts, decks, and foundations.
- You can carry a level around corners without losing accuracy.
- You can work with a low-cost tool that doesn’t need power.
That matters whenever you want to build with your crew, not guess alone. A level hose keeps you in step with the job and the team.
Tools and Materials You Need
Once you know why a level hose saves time and guesswork, it helps to gather the right gear before you start. You need clear tubing, a bucket or small reservoir, clean water, and a little food coloring so you can read the line fast. Grab hose clamps or zip ties too, because they keep everything steady and help you feel like the setup won’t wander off on you.
For measuring radiators, you might also want a tape measure and a pencil for clean marks. A stable support board and simple hose storage make the job easier between uses, since tangled tubing can waste your patience. Keep a rag nearby for drips, and choose enough hose length for the space. With these basics, you’ll fit right in on site and work with confidence.
How to Set Up a Level Hose
Start picking a hose long enough to reach both points without strain, since a little extra length gives you room to work.
Then fill it with clean water until the tube is full and bubble-free, because trapped air can throw off your readings.
After that, set your reference marks at each end and let the water find the same level on both sides so you can mark your line with confidence.
Choose Hose Length
Choosing the right hose length is the initial step to setting up a level hose that works smoothly, because too short leaves you stuck and too long makes the tube harder to handle. You want enough reach to move between points without stretching the line. For most carpentry jobs, pick a length that fits your site and leaves a little slack for easy shifting.
- Measure the farthest points initially.
- Add extra length for corners and safe movement.
- Store the tube with hose maintenance in mind, then use seasonal storage to keep it from cracking.
That way, you stay ready with your crew, and the hose feels easy to manage, not like a stubborn garden snake.
Fill With Water
A clear hose only works well whenever you fill it the right way, because trapped air can throw off the water line and make your mark drift. Initially, dip one end into a bucket and let the hose drink slowly. Should you need more contrast, add a few colored additives so the meniscus stands out. Keep the line smooth, with no kinks or loops.
| Step | What you see | Why it matters |
|---|---|---|
| Start | Water moves in | Air leaves with it |
| Midway | Clear stream | You catch bubbles fast |
| End | Full hose | Level readings stay true |
Watch for temperature effects too, since warm water expands a bit and cold water can slow the flow. Then raise both ends and check for bubbles. Once the tube stays full, you’re ready to work with your crew.
Mark Reference Points
Set your reference points with care, because this is where the hose begins to earn its keep. You’re not just making marks; you’re building trust in your post alignment and reference mapping. Pick one solid starting point, then hold the water line steady against it.
- Mark the initial post where the meniscus sits, then keep that mark clear.
- Move to the next point and match the same water level before you mark again.
- Repeat this rhythm around corners, so every post speaks the same level language.
If the hose shifts, pause and reset it. That small check saves a lot of grief later. Whenever you work this way, you stay in step with the crew, and your layout feels calm, fair, and ready for the next cut.
Reading the Water Level Correctly
Reading the water level correctly starts with the meniscus, which is the curved surface you see where the water meets the tube. You want your eyes at the same height as that curve, not above or below it. That keeps capillary action and surface tension from tricking you into a false reading.
Then watch both ends until the water settles, because rushing only adds guesswork. Should one side looks a little higher, trust the still line, not the wobble.
You and your crew can stay confident whenever you read it the same way every time. A steady, level view helps everyone work together without second-guessing. Keep the tube clear, and the result stays easy to see.
Setting Posts With a Level Hose
To mark posts true and keep your layout from drifting, use the level hose as a calm, steady guide. You’ll feel more confident whenever each post lines up with the next, especially on fences, decks, and barn corners.
Set your post depth initially, then check the top mark where the water settles. For frost footings, measure from the same reference point so every post starts fair and square.
- Sink the opening post and brace it firmly.
- Hold the hose end at the mark and wait for the water to settle.
- Mark the second post, then repeat the same height around the run.
That simple rhythm helps your crew stay in sync, and it keeps the work feeling smooth, even whenever the ground fights back.
Checking Long-Distance Heights
You can check long-distance heights with a level hose via reading the water at two points and matching the meniscus on each end.
This lets you move a level line across wide spaces without guessing, even while posts, corners, or slopes get in the way.
Whenever you keep both ends steady, you get a simple, accurate height transfer that saves you time and worry.
Long-Distance Leveling
Across a long run of posts, beams, or foundation points, a level hose gives you a simple way to check heights without fancy gear. You fill it, clear the air, and let water do the work. That shared water line helps you feel confident whenever the site stretches farther than your tape can easily reach. Pressure effects stay minor provided you keep both ends open, and thermal expansion barely matters during a quick check.
- Set one end on your initial mark.
- Move the other end to the next point.
- Wait for the water to settle, then mark it.
You’ll fit right in with crews who like tools that are cheap, steady, and kind to tired backs. Whenever the line runs far, this hose keeps everyone on the same level.
Accurate Height Transfer
A level hose can save your day whenever you need to carry a height from one place to another without guessing or fuss. You set one end at your mark, then raise the other until the water sits at the same line. That gives you an honest transfer across yards, corners, and uneven ground.
Unlike fancy tools, it leans on simple calibration techniques, so you can trust the reading without extra setup. Keep the hose full, clear, and steady, because trapped air or thermal expansion can nudge the water line a bit.
Whenever you work with a teammate, you both feel more confident and less rushed. That shared rhythm helps you mark posts, forms, and pads with calm accuracy, even whenever the site feels messy.
Two-Point Water Reading
Set both ends of the hose at two spots while you need to check a long-distance height, and the water will tell the truth for you. You watch each meniscus, and both ends share the same level through fluid communication, even provided the points sit far apart.
- Hold one end at your reference mark.
- Move the other end to the second spot.
- Wait for the water to settle before you mark.
Because ambient pressure acts evenly on the water, the level stays honest without batteries or fancy gear. You and your crew can work like a tight team, even across a yard or building frame. Should one side read higher, shift it until both match. Then you’ve got a clean height transfer that feels simple, steady, and reliable.
Marking Level Lines With Water
With water as your guide, marking a level line becomes a simple job you can trust. You don’t need to chase calibration myths or worry about fancy gear. Water finds its own level, and that gives you a steady reference point.
Set your clear hose beside a post, wall, or footing, then let the meniscus rest where you need it. Once both ends match, you can mark the line with confidence.
This old trick comes from historical methods that builders used long before batteries and lasers. You and your crew can move together, check each mark, and keep the worksite calm. It’s a quiet tool, but it helps everyone feel on the same page.
Using a Level Hose on Slopes
Even on a slope, you can trust a level hose to tell the truth, because water still settles into a horizontal line. Whenever you work on hillsides, you don’t need to guess. You use slope compensation to compare points at different heights, and you let gradient mapping show where the ground rises or falls. That helps you place posts, forms, and footings with calm confidence.
- Set one end at your reference point.
- Hold the other end at the next spot, even though the ground drops.
- Wait for the water levels to match, then mark your line.
With this method, you stay in step with the land instead of fighting it. You’ll feel like part of a crew that gets it right together.
Common Level Hose Setup Mistakes
One small setup mistake can throw off your whole level hose reading, but the encouraging part is that most of them are easy to catch prior to you start marking.
You can help yourself through checking for air entrapment prior to you trust the water line. In case you see bubbles, flush the tube again and keep the ends upright.
Next, watch for kinks or tight bends, because they can hide trapped air and slow the flow.
You should also mind temperature effects, since hot water and cold water can shift the level a little.
Keep both ends clean, stable, and at the same height while you fill the hose.
Then, let the water settle before you read the meniscus.
As soon as you move together with care, the tool works right with you.
When a Spirit Level Is Better
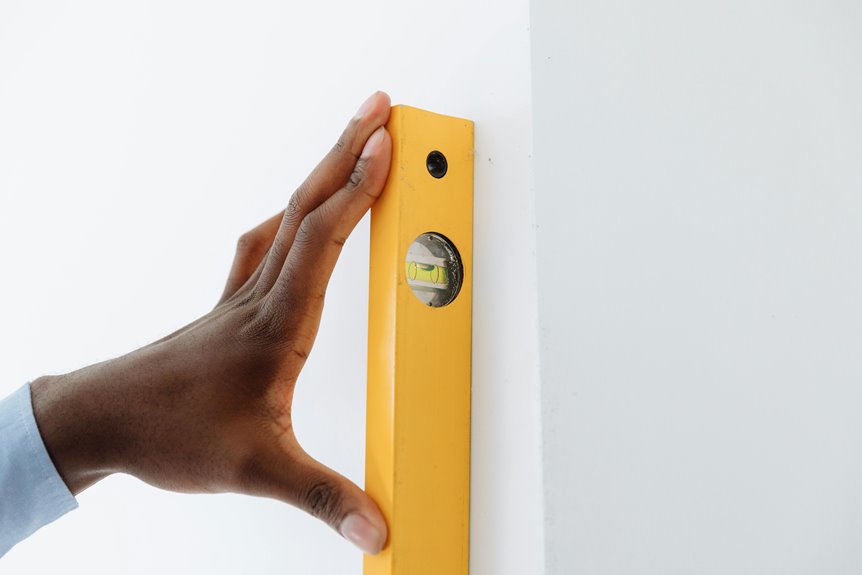
A spirit level is often the better choice whenever you need a quick, simple check over a short distance, because it gives you an instant read without setting up a hose or waiting for water to settle.
You’ll feel right at home using it on shelves, trim, frames, and small posts. Unlike a hose, it has no battery reliance, and it skips optical calibration, so you can grab it and go.
- Use it for short runs where speed matters.
- Use it whenever you need one hand free.
- Use it whenever you want a clear bubble check in tight spaces.
Keeping Your Level Hose Accurate
Clear water gives your level hose its honesty, so keeping it accurate starts before you ever measure. You belong to the crew whenever you treat hose maintenance like part of the job. Flush out grit, check fittings, and lift the tube so no air hides inside. Temperature effects can shift the water line, so let the hose settle in the same shade or weather you’ll work in.
| Check | Why it matters | Easy move |
|---|---|---|
| Clear water | Easy to see | Add a drop of dye |
| No bubbles | Keeps readings true | Tap the hose gently |
| Stable ends | Stops drift | Tie ends to stakes |
| Same height | Confirms balance | Compare meniscus marks |
Before each mark, test both ends together, then keep the hose coiled loosely. That way, your layout stays trusted and your team stays confident.
Frequently Asked Questions
Can a Level Hose Be Used in Freezing Weather?
Yes, you can use a level hose in freezing weather if you add freeze protection and keep the water moving. Watch for thermal contraction, since it can affect readings.
How Do You Clean a Level Hose After Use?
Run clean water through the hose until the water comes out clear, then wipe the ends with a mild vinegar mix. Let it dry completely, coil it loosely, and store it.
What Hose Diameter Works Best for Carpentry?
For carpentry, a 3/8 inch inside diameter hose is often the best choice because it offers a good balance of flow, visibility, and tool compatibility. It is easy to handle and remains accurate for most leveling tasks.
Can Two People Use a Level Hose Around Corners?
Yes, two people can use a level hose around corners by working in sync. Keep both ends steady and unobstructed, and use a flexible coupling where needed to get accurate readings.
How Do You Store a Level Hose Without Damaging It?
Drain the hose fully, then coil it in broad, relaxed loops so it stays free of kinks. Hang it on a wall hook or hose reel to keep it protected, clean, and ready for use.



