Address
304 North Cardinal
St. Dorchester Center, MA 02124
Work Hours
Monday to Friday: 7AM - 7PM
Weekend: 10AM - 5PM
Address
304 North Cardinal
St. Dorchester Center, MA 02124
Work Hours
Monday to Friday: 7AM - 7PM
Weekend: 10AM - 5PM

Should you want to update 1950s kitchen cabinets without losing their charm, start by checking the wood, doors, and finish for damage or moisture. Then you can choose the smartest path, whether that’s paint, refacing, or full replacement. After that, prep matters more than most people believe, because a clean, smooth base makes every next step easier. Once you’ve got that part right, the real change starts to show in ways you may not expect.
Before you pick paint or new hardware, take a close look at what you already have, because the condition of your 1950 kitchen cabinets will shape every choice that follows.
Start with a structural inspection of each box, door, and frame. You want to spot loose joints, warped panels, or soft wood before you go any farther.
Then check for peeling finish, chipped edges, and old repairs that might need extra care.
Moisture testing matters too, since concealed dampness can ruin a fresh update fast. Open doors, feel for swelling, and look under sinks where leaks like to hide.
If your cabinets are solid and dry, you can move ahead with confidence and feel part of a smart, budget-friendly crew that knows good bones matter.
Now that you know your cabinets are solid, you can choose the smartest path forward: paint, refacing, or full replacement. Paint works best once you want a fresh look fast, and your paint options can match vintage charm or modern style. Refacing gives you new doors and fronts, so it feels closer to a remodel without gutting the room. Replacement makes sense whenever the boxes are damaged or the layout no longer fits your life.
| Choice | Best for | Budget feel |
|---|---|---|
| Paint | Strong cabinets, quick change | Lowest |
| Refacing | Good structure, new style | Midrange |
| Replacement | Major damage, new layout | Highest |
Use a clear cost comparison so you can join the option that fits your home, your pace, and your people.
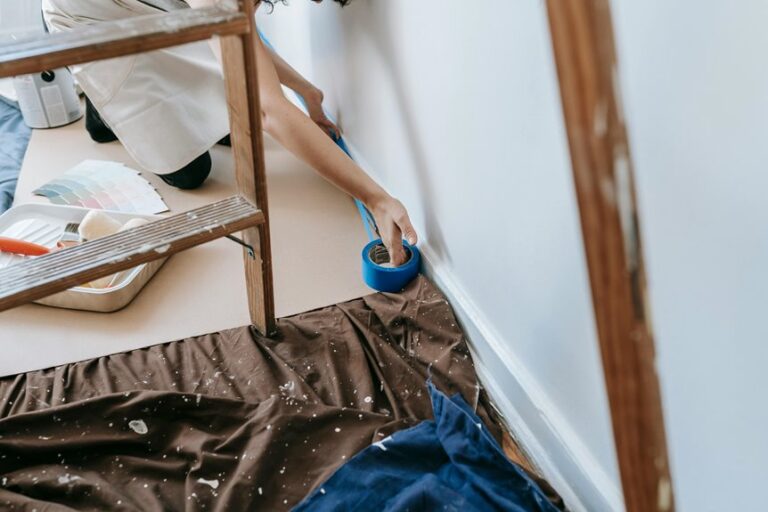
Before you paint, you need to give those 1950s cabinets a clean, smooth start.
Wipe away grease and grime initially, then sand the surfaces so the new finish can grip well.
Should you spot chips, dents, or loose spots, fix them now so they don’t show up later like uninvited guests.
Start with a deep clean, because old 1950s kitchen cabinets often hold years of grease, smoke, and sticky cooking residue that can ruin a fresh finish.
You want to feel like you’re bringing these cabinets back into the family, not fighting them. Mix warm water with a gentle degreaser, then wipe one section at a time.
For stubborn spots, do simple grease testing initially so you know where buildup conceals. After that, check solvent compatibility on a concealed area before you use stronger cleaners.
Use soft cloths and fresh wipes often, so you don’t spread grime around. Keep working until the wood feels clean, not slick.
Once you finish, let the cabinets dry fully. That clean surface helps your next step go smoothly and keeps your project looking sharp.
With the cabinets clean and dry, you can finally see the real surface you’re working with, and that makes the sanding and repair stage much easier to handle.
Start with a medium-grit paper to remove old finish, then switch to finer grits so you don’t scratch the wood.
You’re not chasing perfection, just a smooth base that helps the new finish stay put.
Should you find dents, chips, or small gaps, use epoxy fills and shape them before they harden.
After that, sand the patches flush and check grain matching so repairs blend with the original wood.
Take your time around edges and doors, because these details help your cabinets look like they belong right where they are.
Painting your 1950 kitchen cabinets can completely change the room’s mood, even in the event that the rest of the remodel still feels unfinished.
You can join today’s color trends without losing that midcentury charm. Soft greens, warm whites, and creamy taupes often feel right at home, and a shade like Hillside Green can make old wood feel fresh again.
Choose a finish made for cabinets, because paint durability matters whenever doors open, close, and get wiped often. After sanding and cleaning, use a primer so the color covers evenly.
Then apply thin coats and let each one dry fully. With steady work, you’ll give your kitchen a cleaner look and a space that feels more welcoming.
Fresh hardware can give your 1950 kitchen cabinets a whole new attitude without changing the cabinets themselves. You’ll feel the shift right away whenever you swap tired knobs and hinges for pieces that fit your home’s spirit. Choose matte black for a crisp, modern edge, or pick vintage reproduction hardware provided that you want that friendly, true-to-the-era look.
Whenever you blend old charm with fresh details, your kitchen starts to feel more like yours. That small change can make the whole room feel welcomed, cared for, and ready for everyday life.
You can make your 1950s cabinets work much harder through adding pull-out storage that brings pans, lids, and pantry items right to you.
Then, you can refine the look with trim details that clean up edges, hide gaps, and give the cabinets a more finished feel. These small updates can make the whole kitchen feel more thoughtful without changing its vintage charm.
A smart pull-out upgrade can change how a 1950 kitchen works without changing its vintage charm. You can add pull out organizers under the sink, beside the stove, and in deep base cabinets, so every pot feels easy to reach. A slim slide out pantry also helps you keep cans, spices, and snacks in one friendly spot.
You’ll notice meals feel calmer when you grab what you need fast. Because these inserts stay concealed, your kitchen still feels like yours, just smarter. Should your cabinets are solid, they can usually handle the upgrade well. Then you get more storage, less clutter, and a setup that fits how you actually live each day.
Trim details can do more than dress up a 1950s kitchen. You can add crown molding to soften the top edge and make the room feel finished, not fussy.
Then, slip in bead molding along doors or drawer fronts to echo the original style and keep the look true to the era. Should you’re adding pull-outs, match the trim around them so they blend in, not shout for attention.
Small touches like these help your cabinets feel like they belong in your home, even though the layout has changed. Use clean lines, steady spacing, and simple profiles so the upgrades feel warm and familiar.
Whenever you pair trim with practical storage, your kitchen gains charm, ease, and a quiet sense of pride.
Yes, you can usually keep them. The cabinet boxes from the 1950s are often solid enough to reuse. Refurbish the surfaces, replace worn hinges, and update the finish so the kitchen keeps its original character while working better for daily use.
Behr Cabinet and Trim Enamel dries the quickest, with rapid drying, water based, low odor, and a fast cure. You can wrap up sooner, keep the kitchen usable, and get a smooth, polished finish.
Matte black knobs and vintage style pulls work especially well on vintage cabinets. Their clean lines and classic feel help the cabinetry look unified. Pair them with flat black hinges to finish the look with a warm midcentury character.
They can perform well if you check the bond first and control moisture. Clean, stable linoleum gives the strongest result, and you will know the floor is ready when the surface is properly prepared.
Yes, you should coordinate cabinet updates with new countertops and appliances. Matching colors and finishes can make the kitchen feel unified, improve how the space functions, and create a result that feels intentional and comfortable.